Configure Workflow
To configure a workflow, follow the detailed steps listed below:
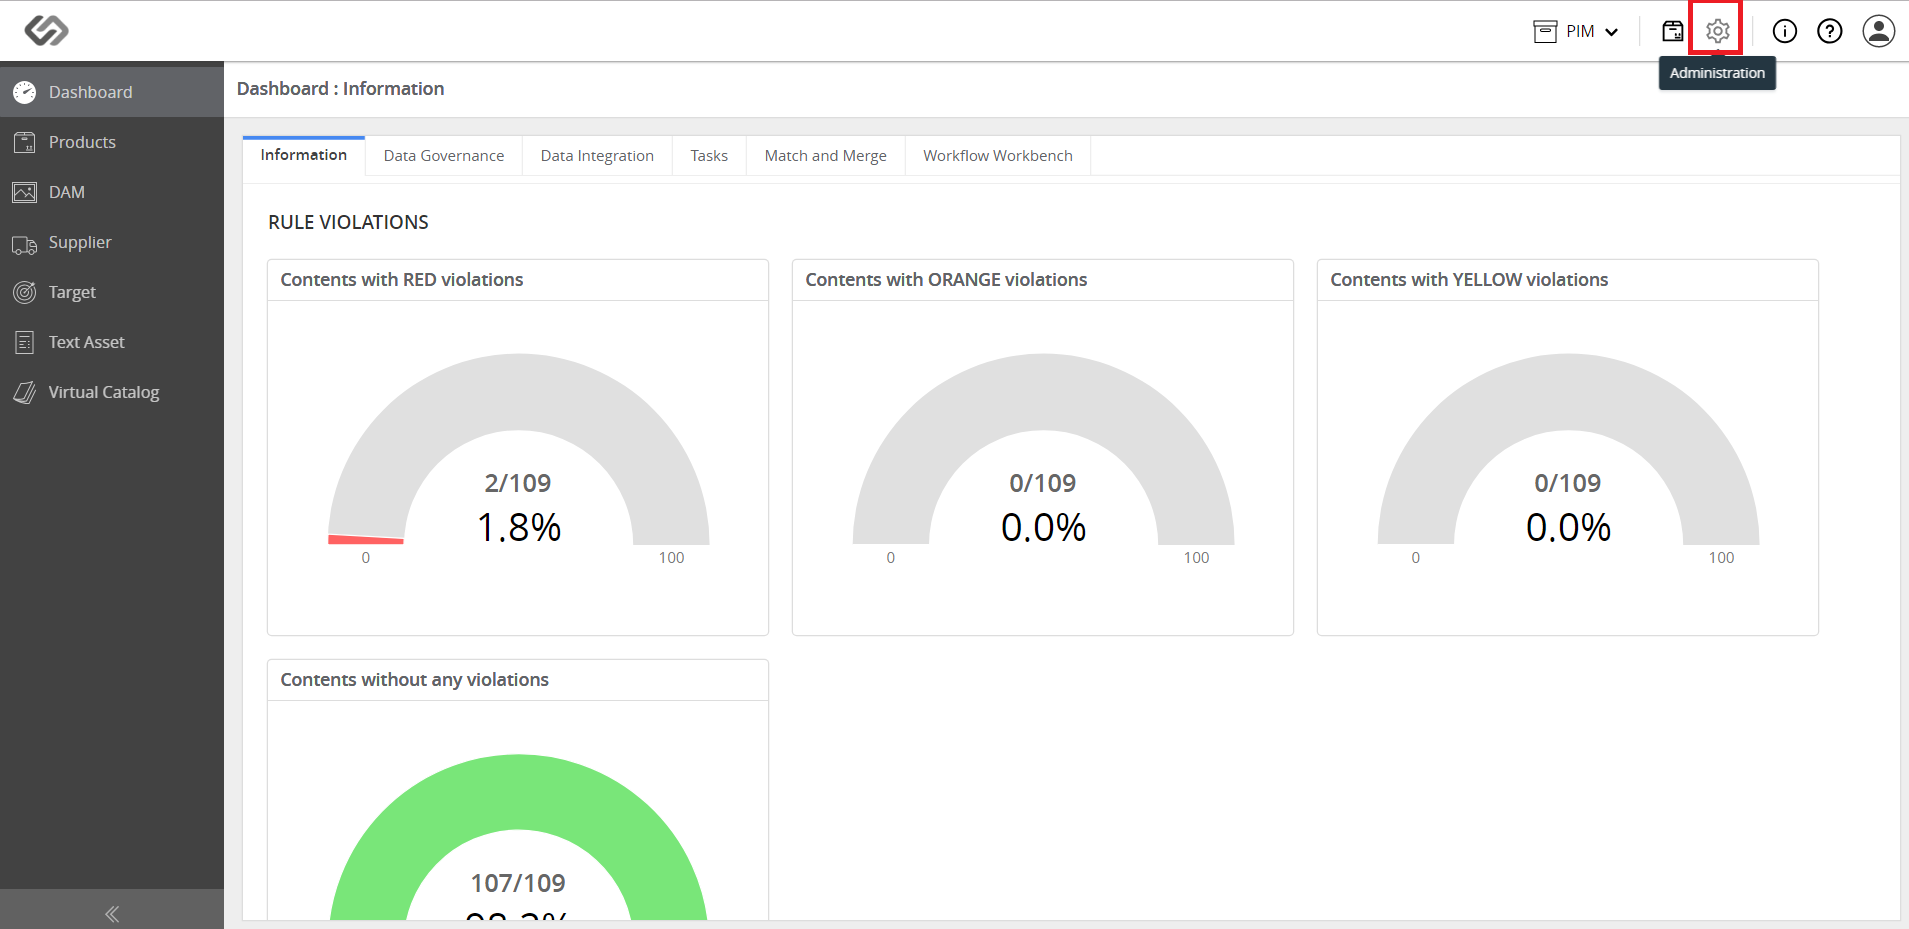
- Log in to the application and click on the Administration button.
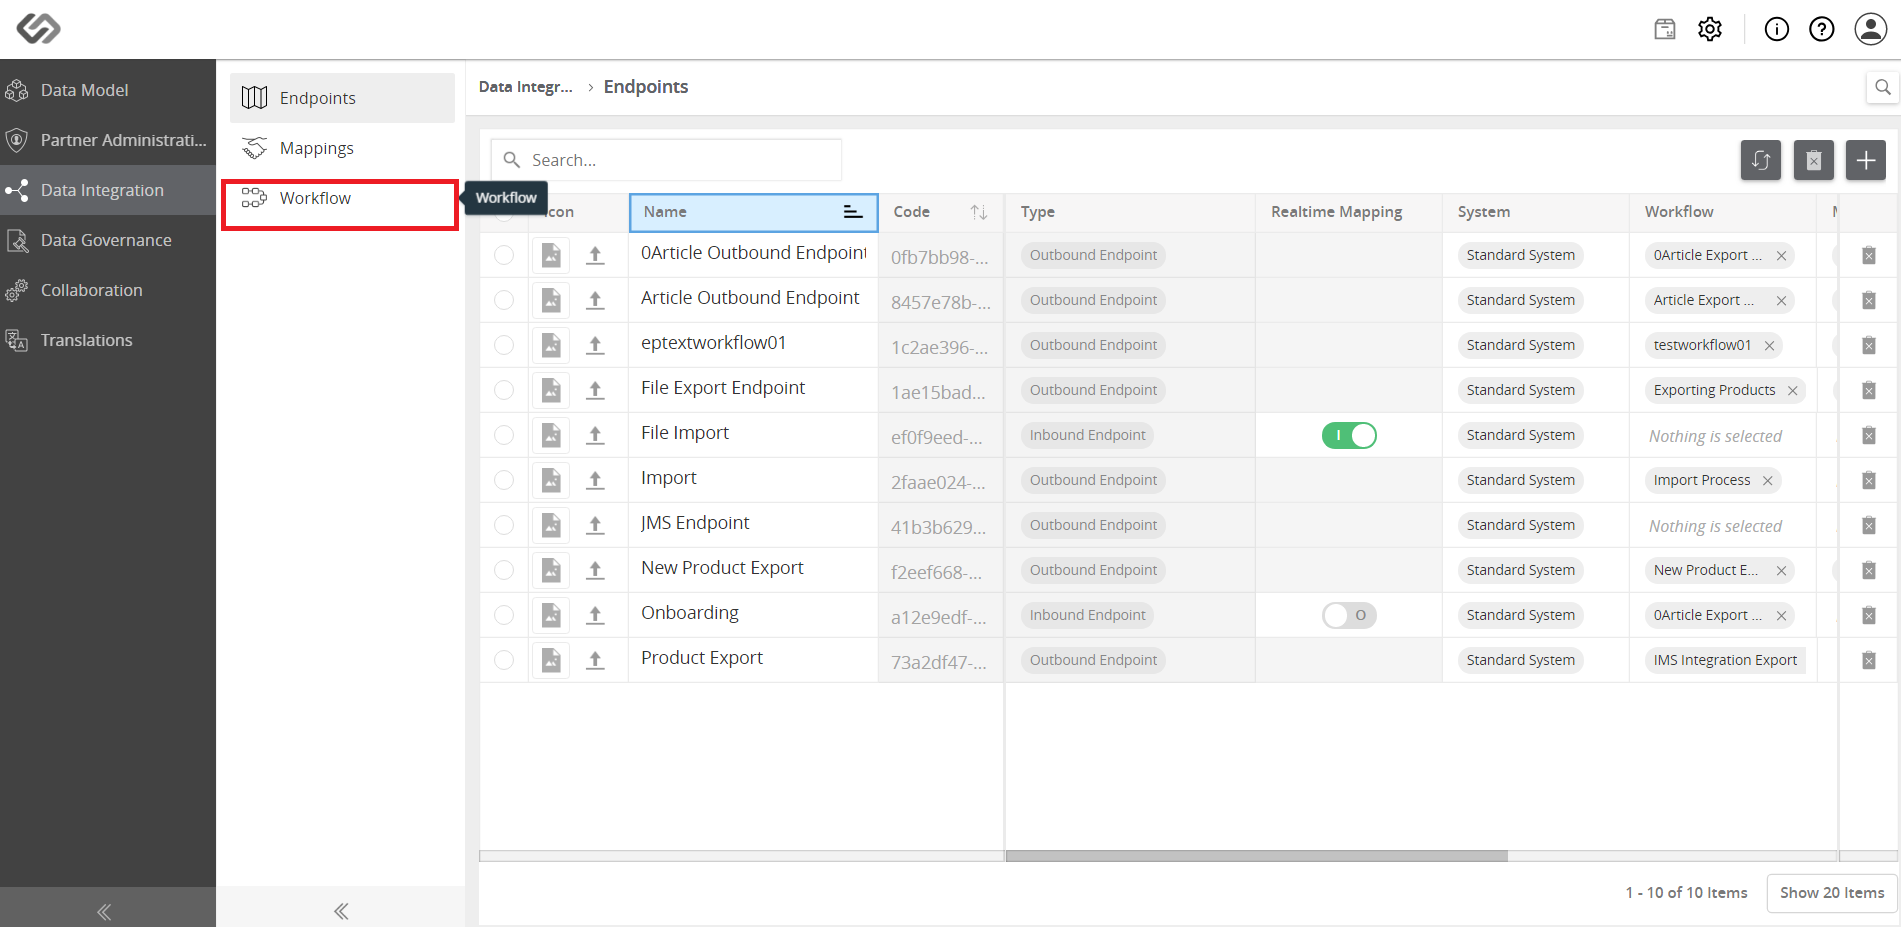
- Go to the Data Integration tab and then to Workflow.
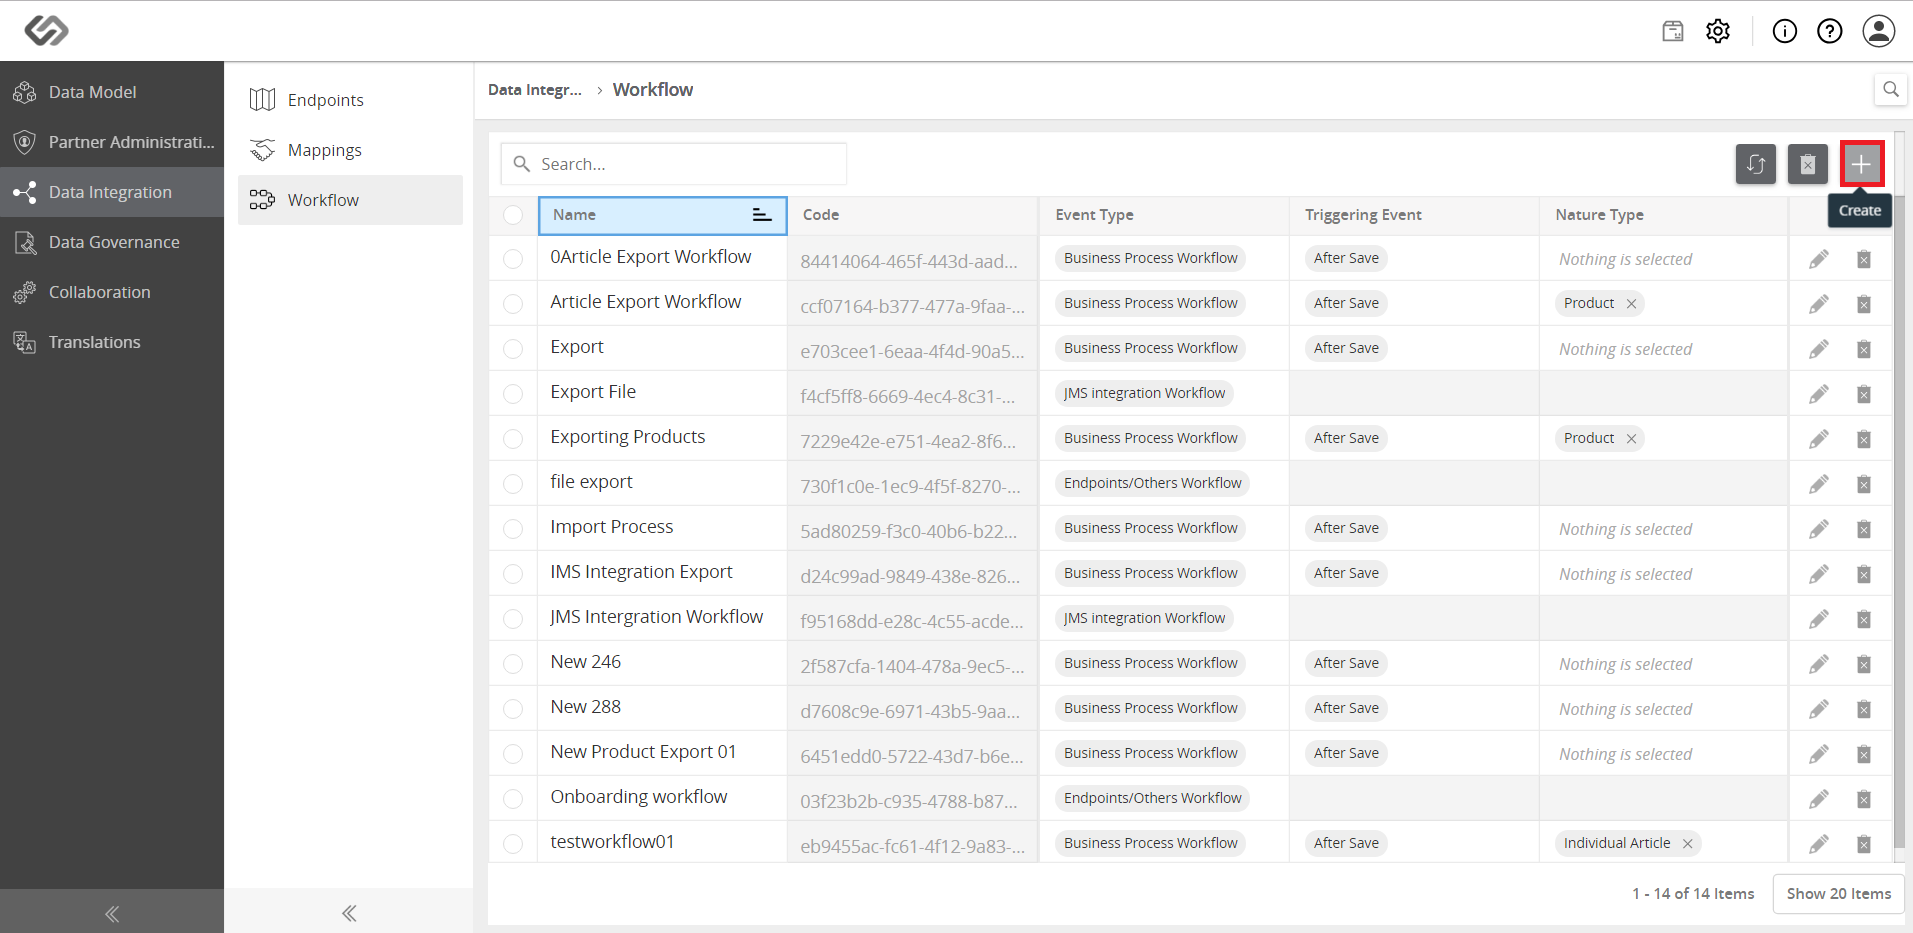
- Click the ‘+’ icon to create a new workflow.
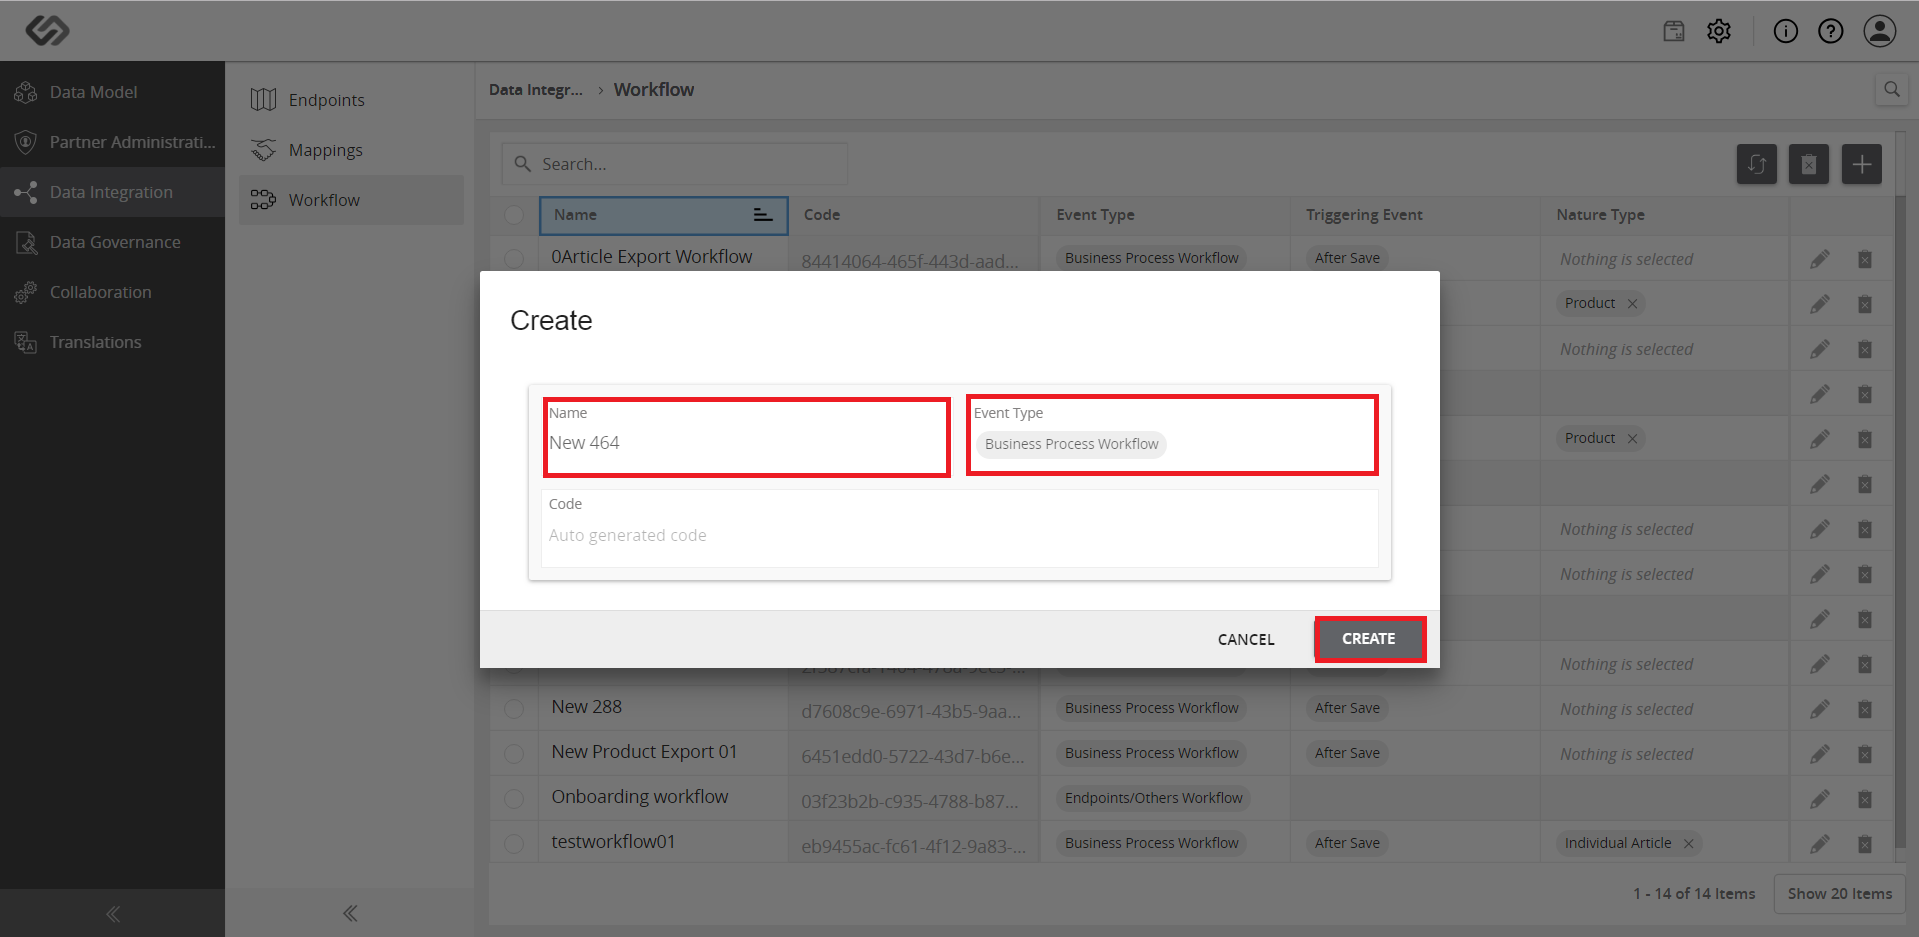
- Provide the following details: Name, Event Type, and Code. Then, click on the Create button.
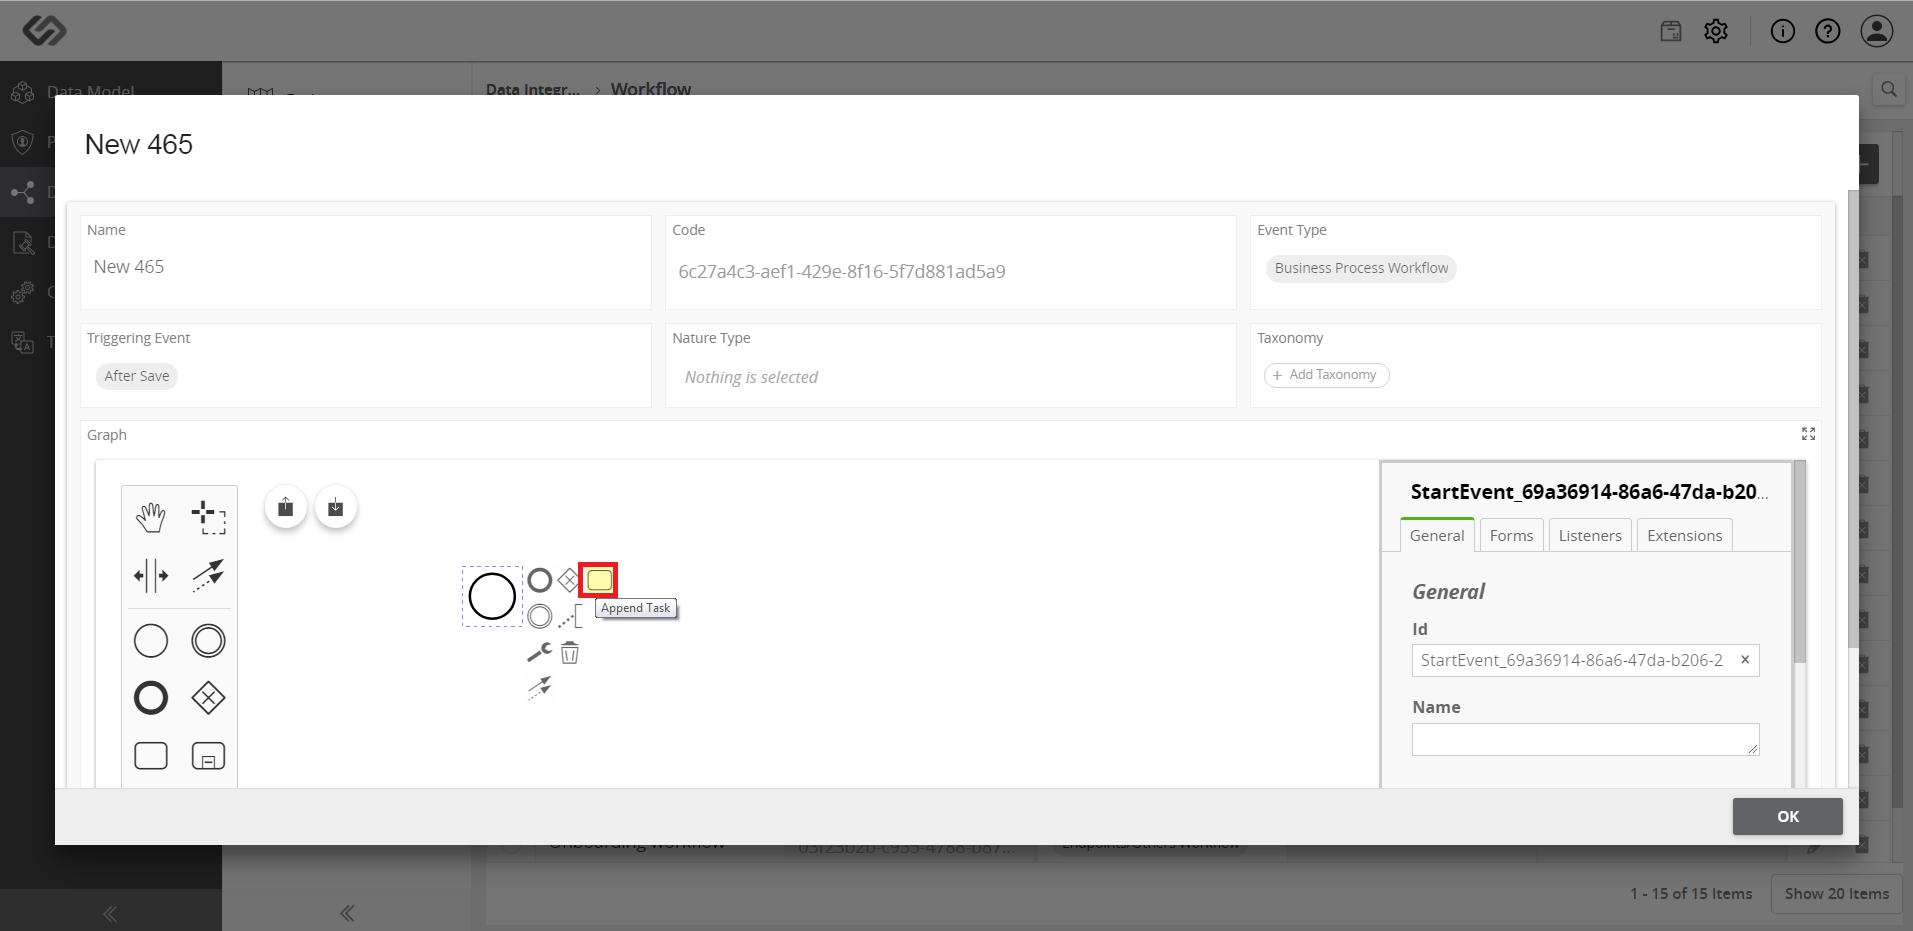
- Select the created workflow and a pop-up window will open where you can define the workflow of the onboarding process.
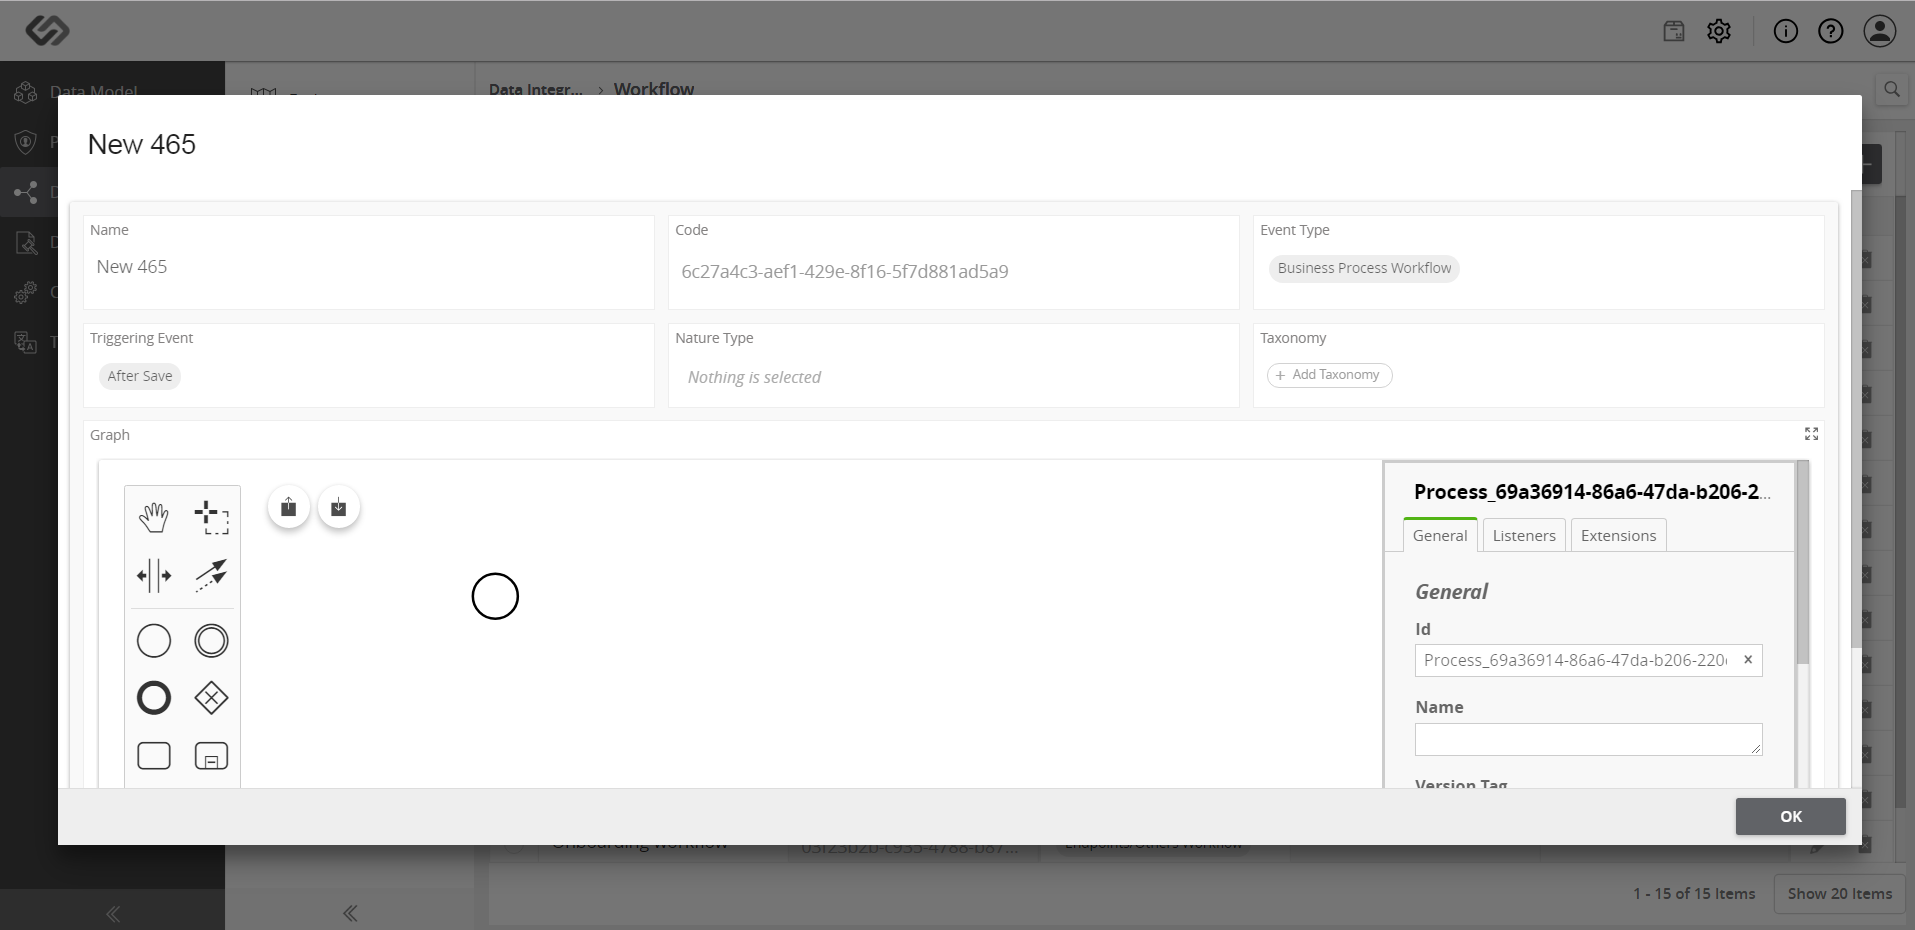
- The Graph section in the pop-up window is divided into three vertical sections. The first and second vertical sections are called Workflow Modeler. It allows users to configure workflows using the BPMN 2.0 Modeling Notation. This can model complex onboarding processes using universally known and standardized notation. The third vertical section contains the details of each component of onboarding file.
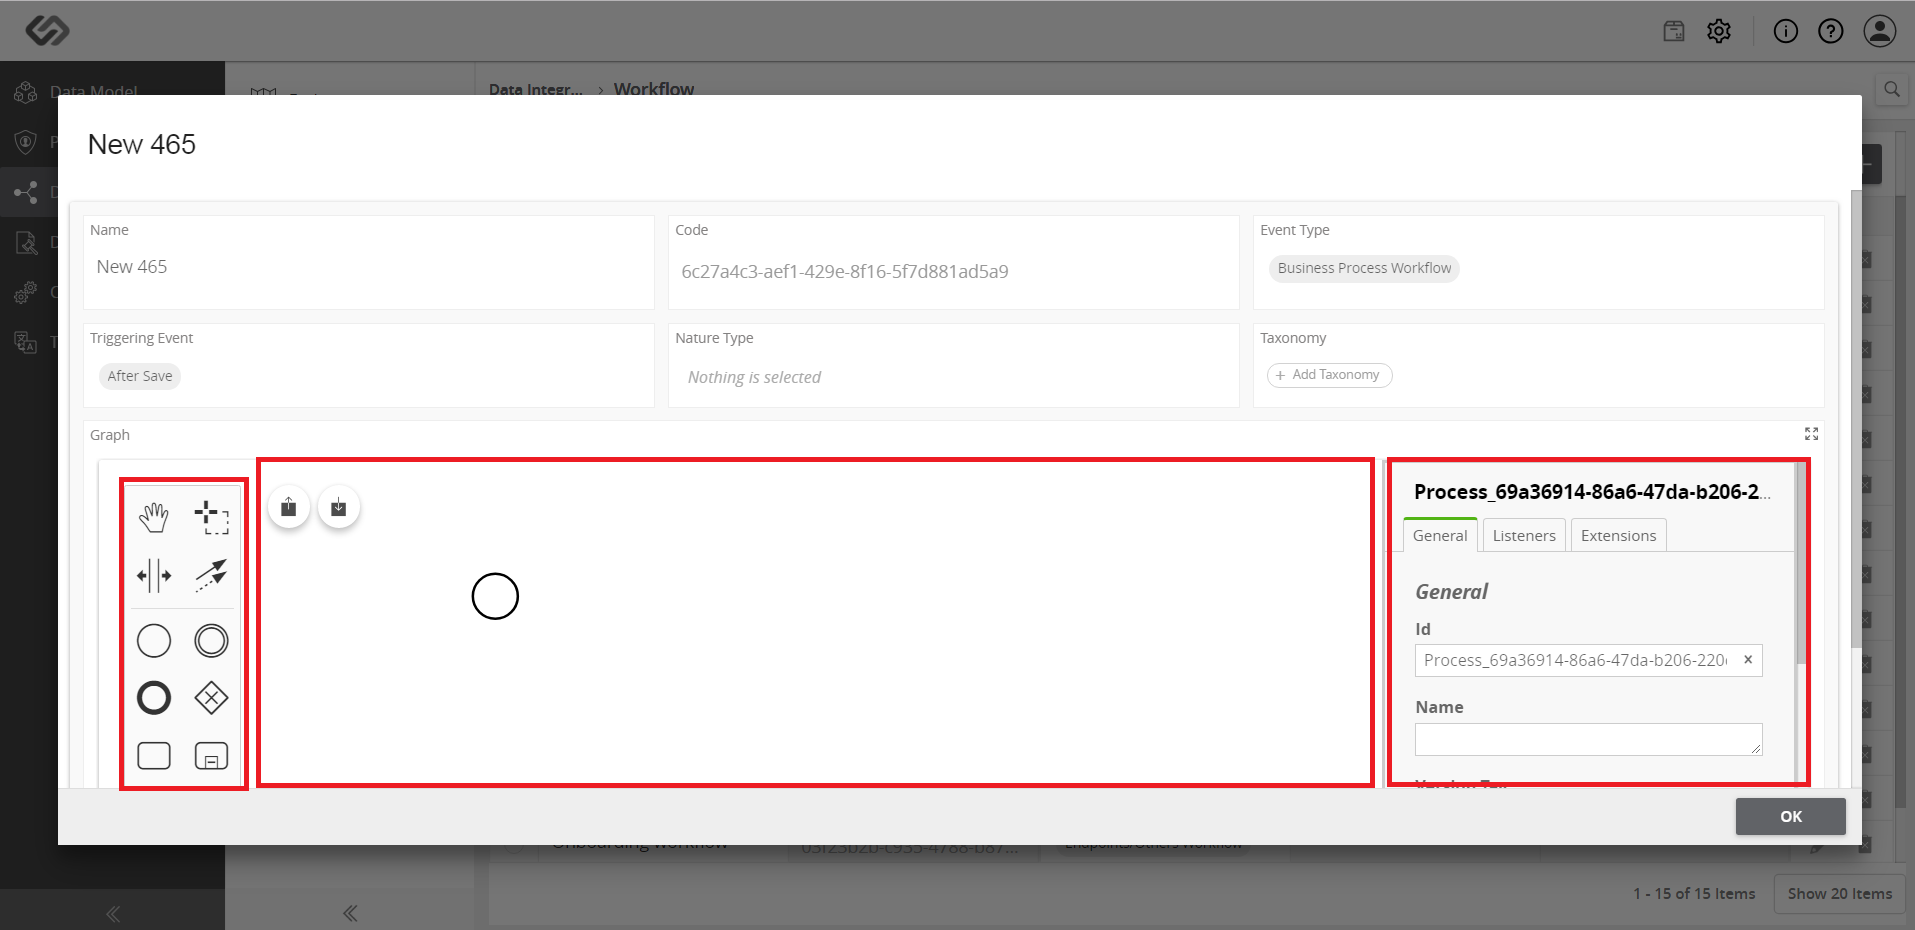
- Drag and drop the notations in the Workflow Modeler to define the onboarding process. The workflow starts with a Start Event. It acts as a process trigger so the first element in the workflow will be the Start Event.
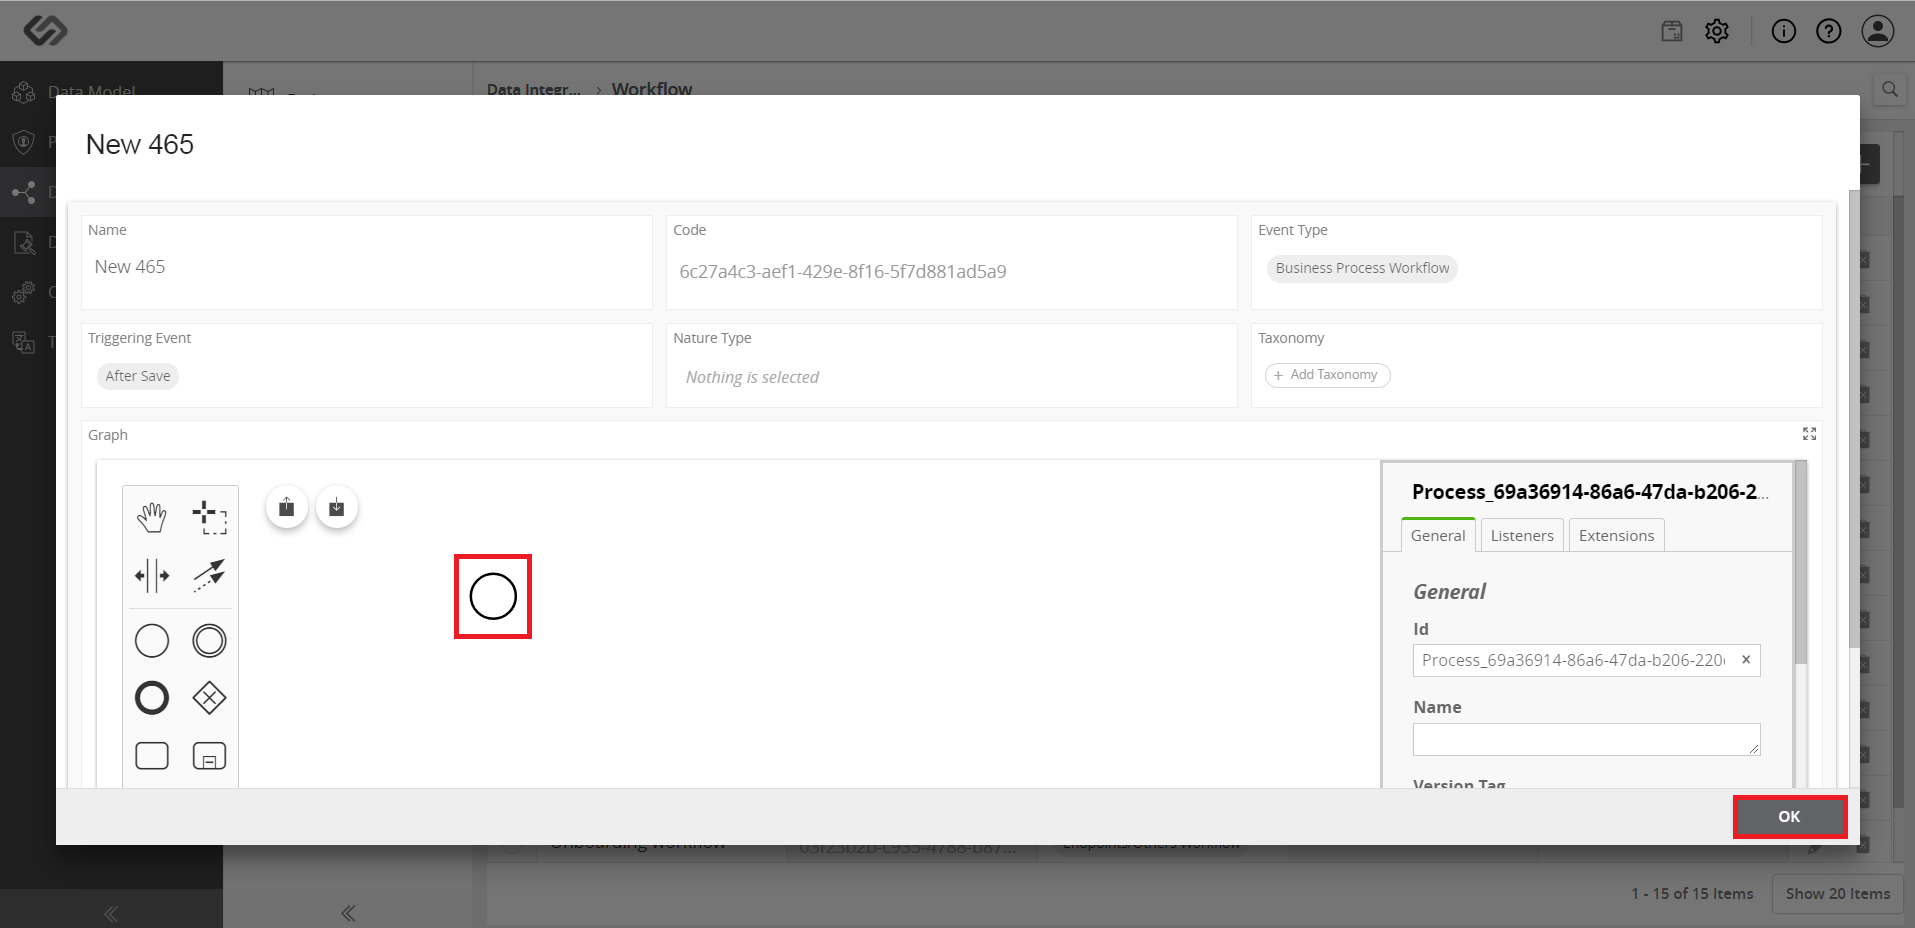
- Select the Start Event notation to see all the options that you can add after this component. It will appear on the right side of the component.
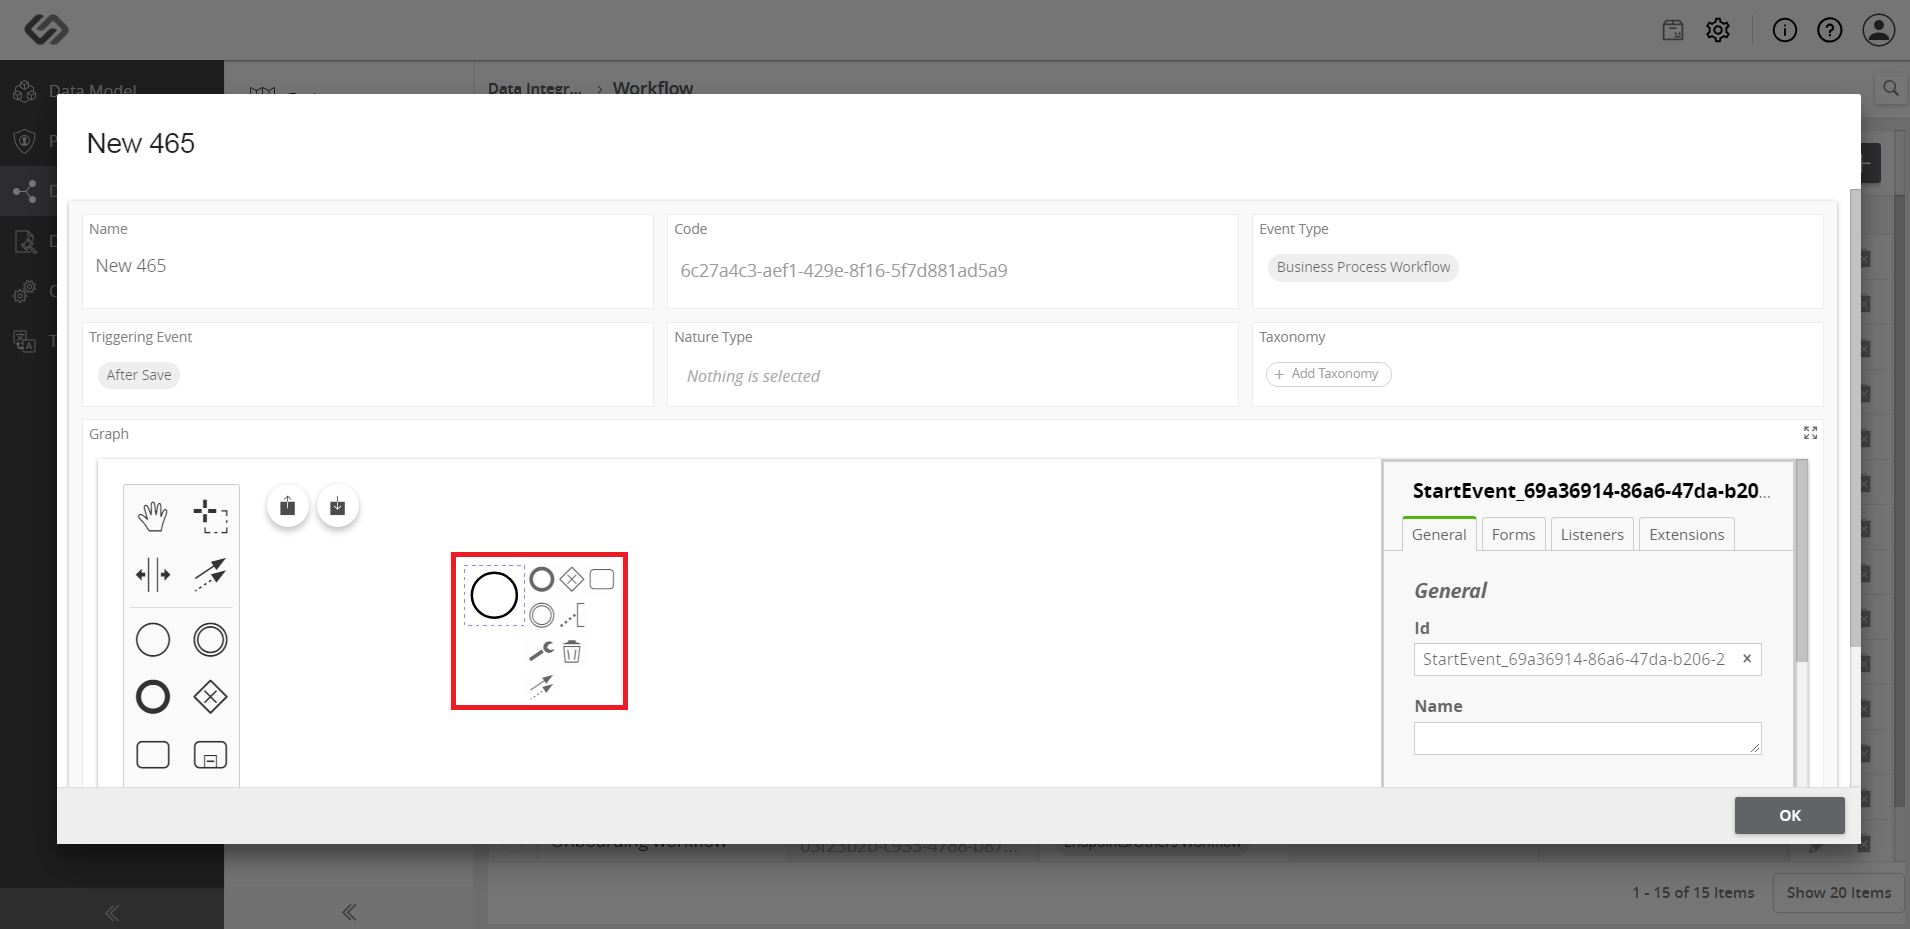
- Add the notations to define a workflow according to the onboarding file. For example, if you want to add an Article in a flow, click on the Task Notation. Custom actions for different users will be managed through the workflow task.
- Click on a Task Notation to add it to the process.
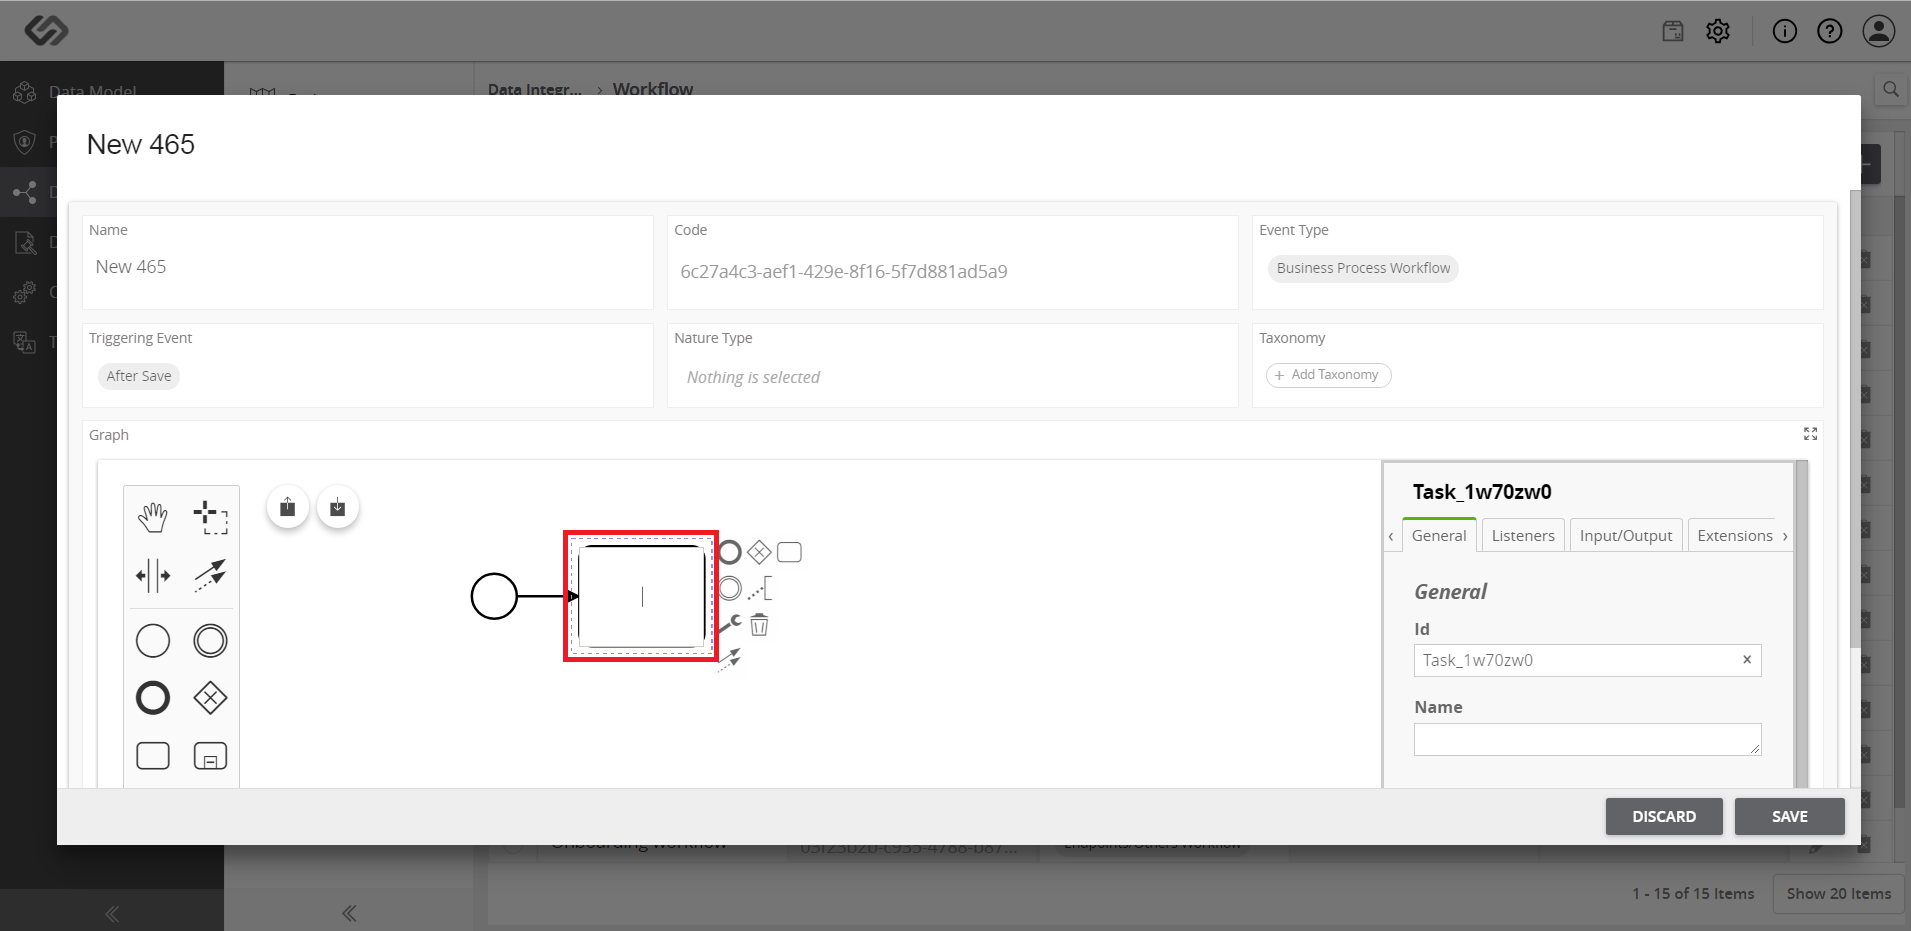
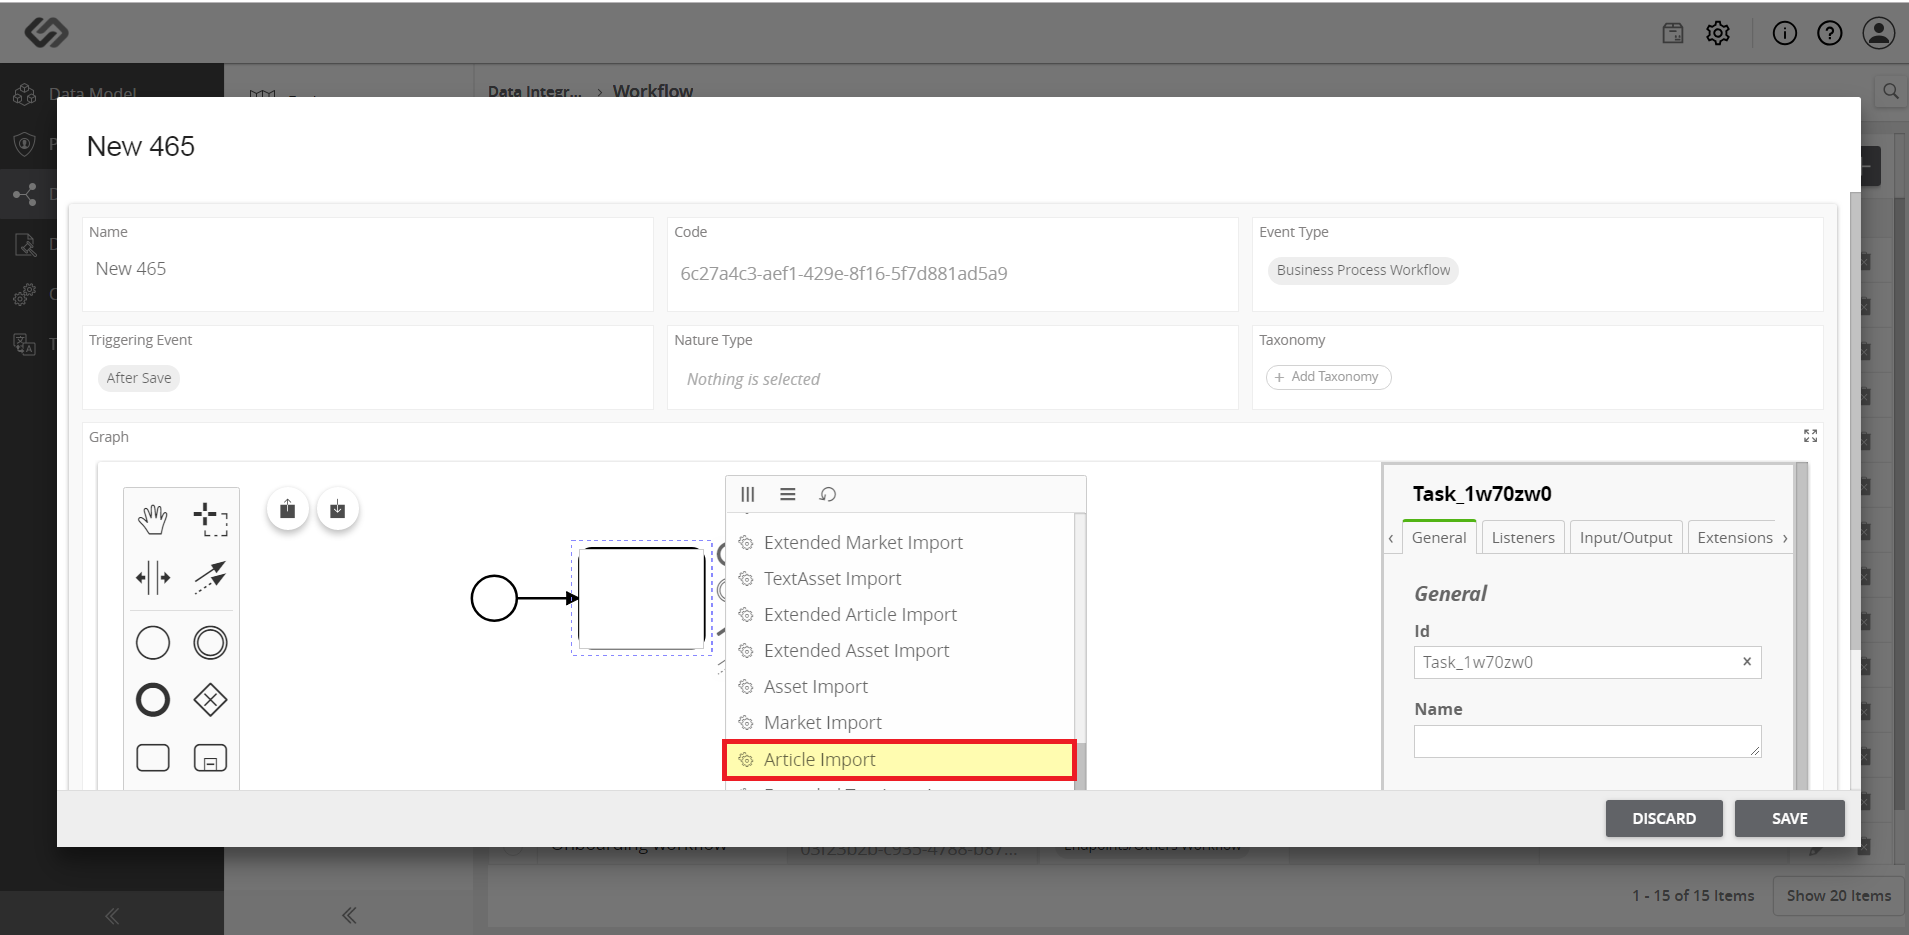
- Note that adding a task notation simply defines the task. Next step is to define what kind of a task it is: whether it is Import Article, Import Asset, or Import Relationship, etc. Do this by clicking on the Change Type icon (icon that looks like a wrench).
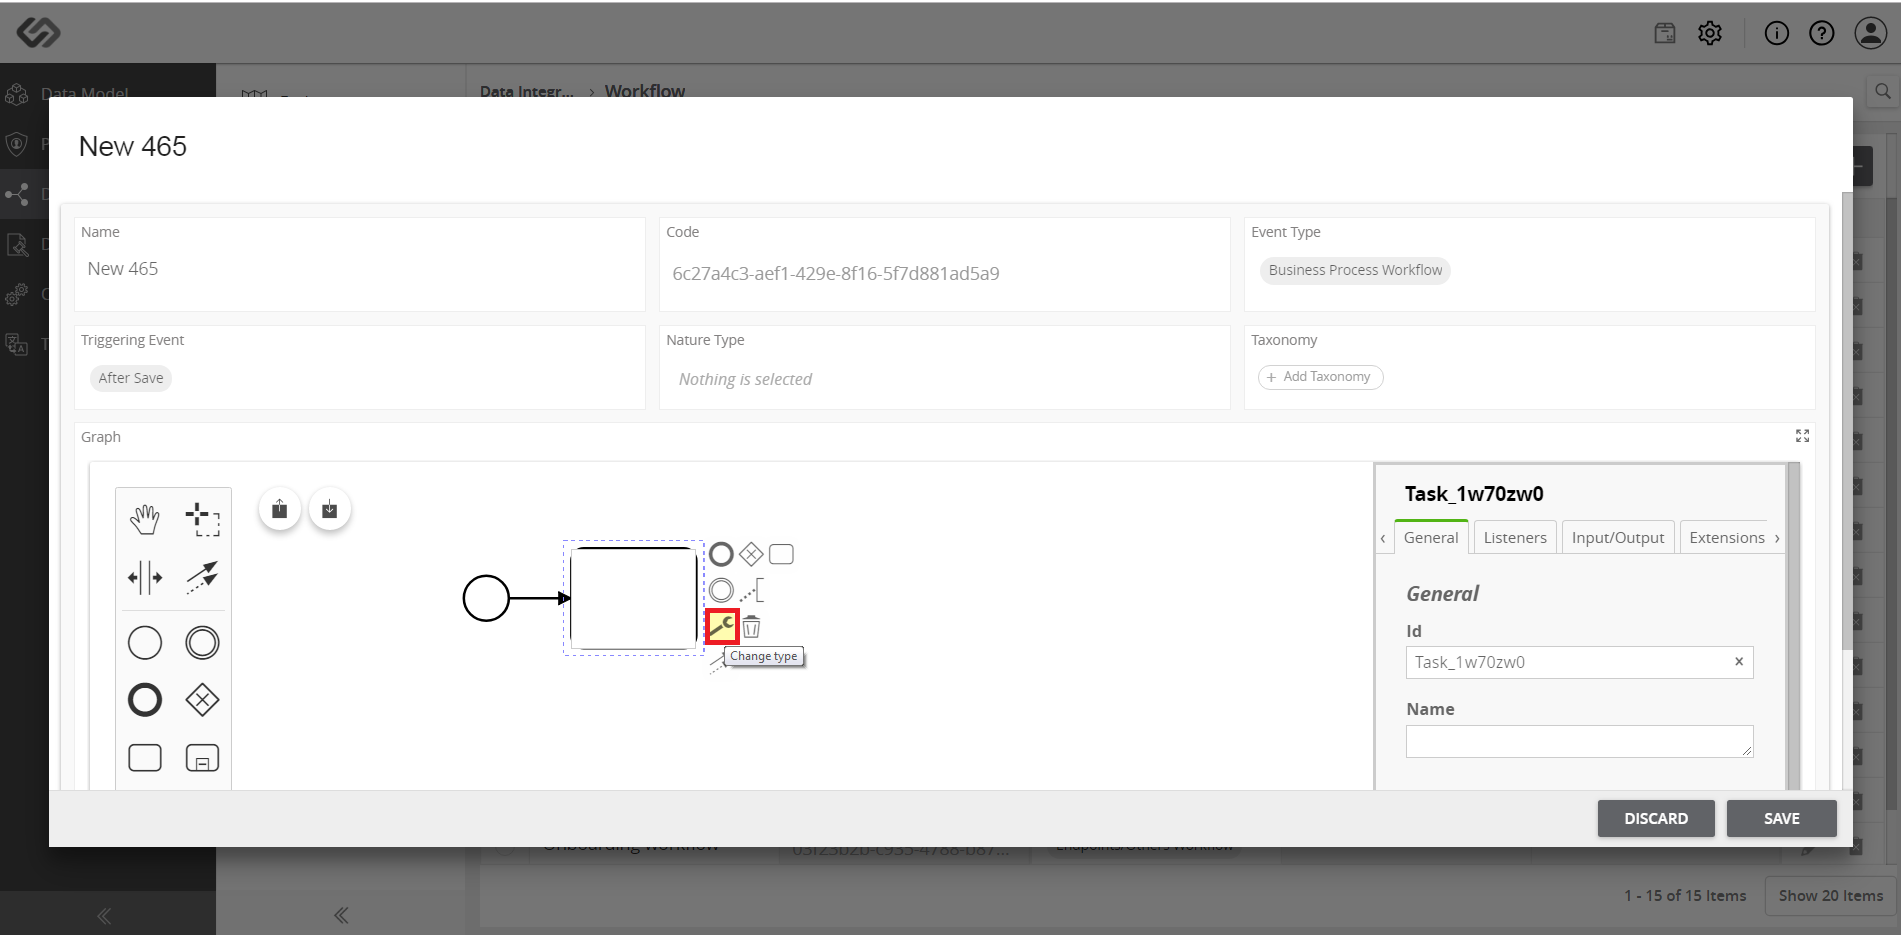
- Once clicked, a pop-up window will appear that contains the various tasks.
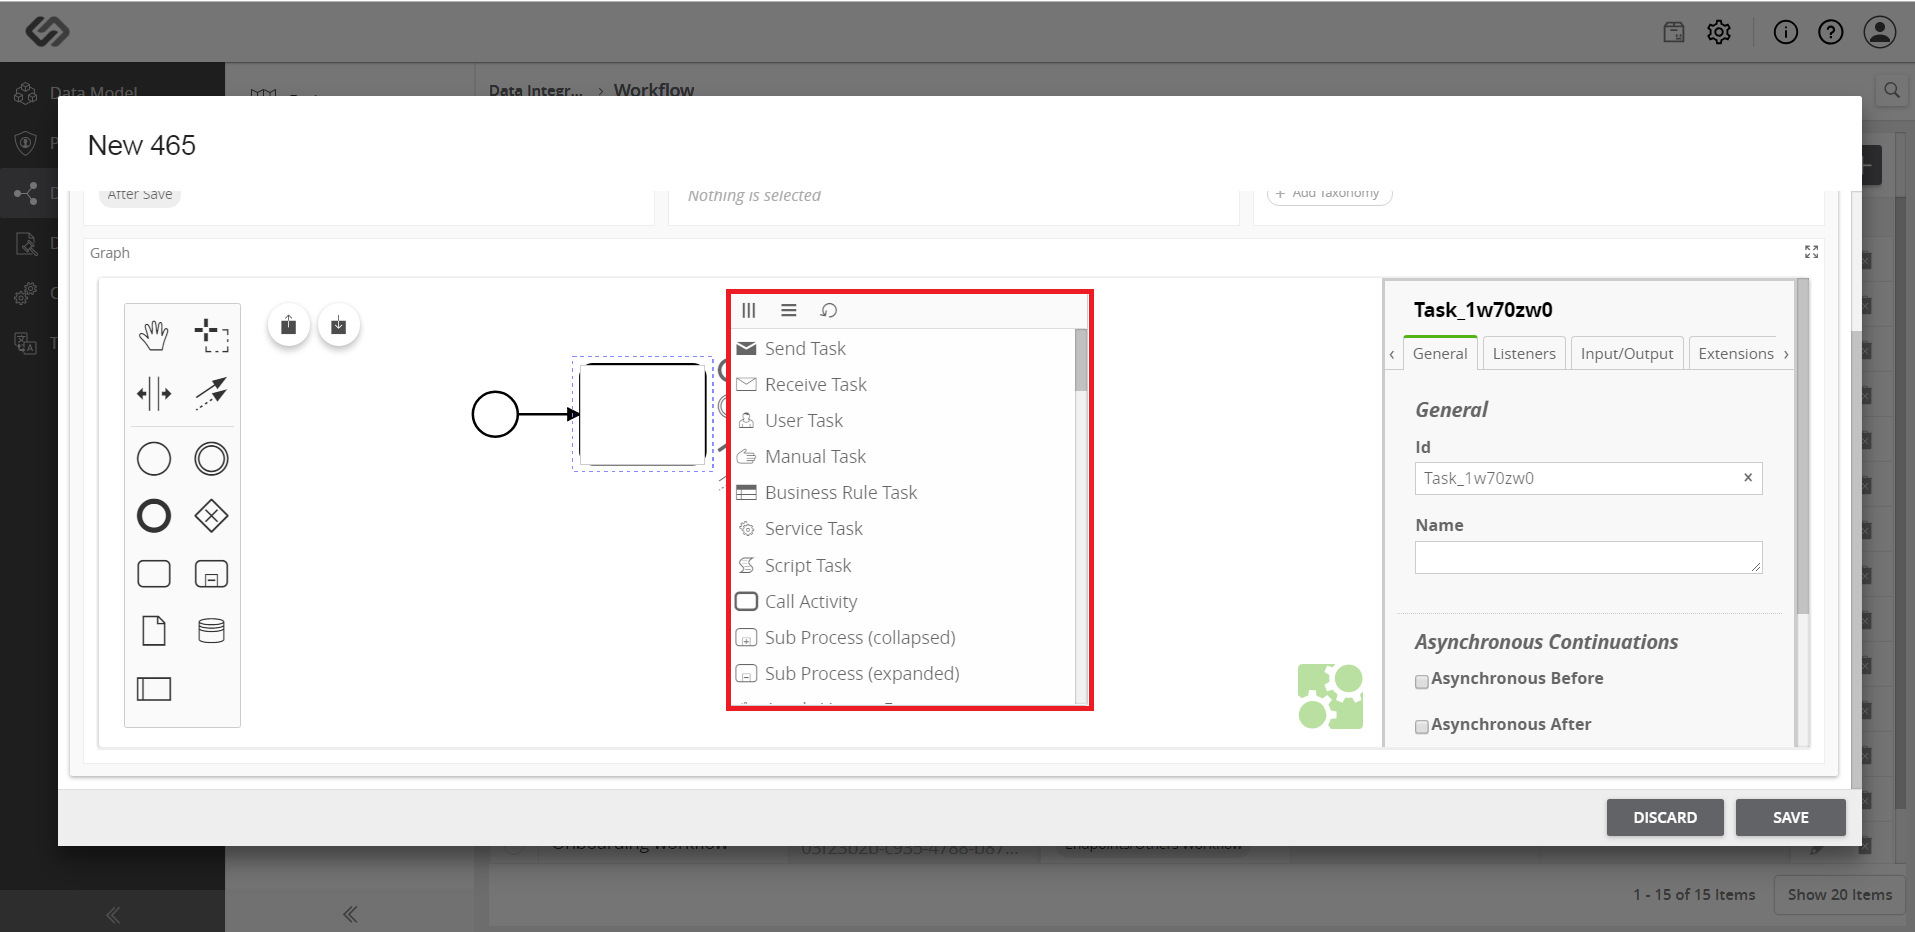
- To define an Article, select the Article Import option from the list.
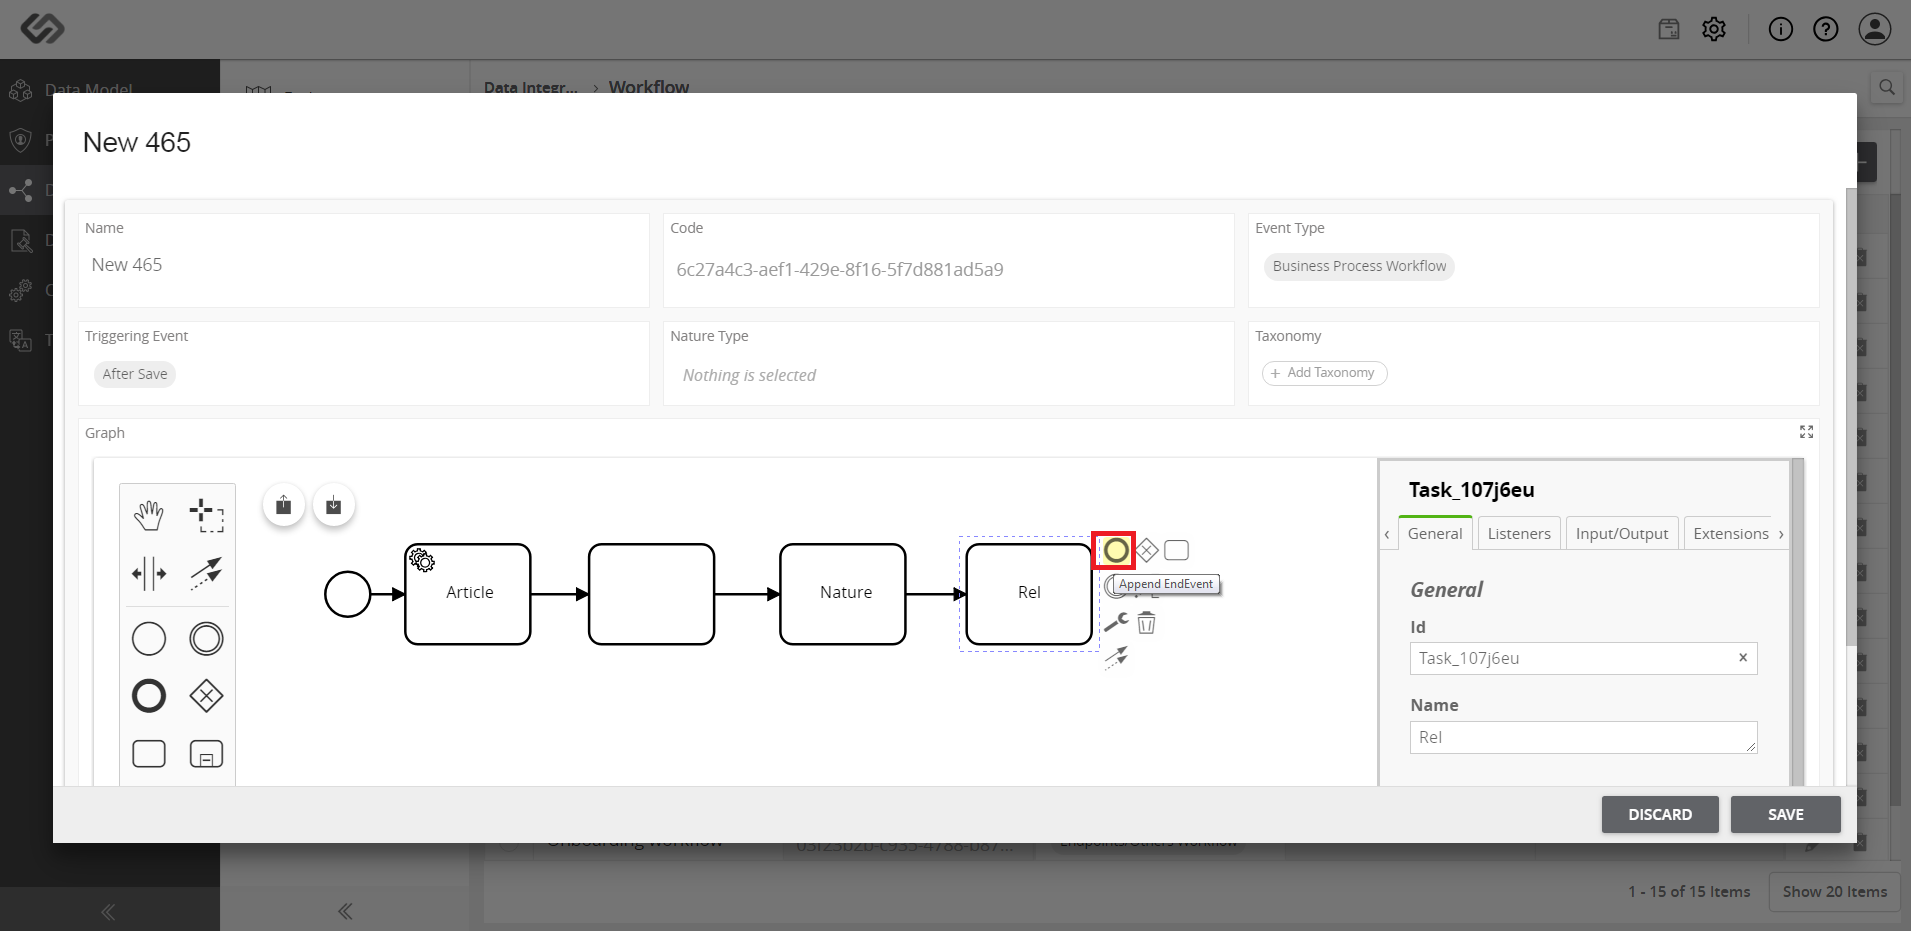
- Double click on the created task and provide a name.

- Define all the components of the system like Assets, Relationships, Nature Classes, etc in a similar manner - (1) creating a task, (2) selecting its type by clicking on the wrench icon and (3) naming it.

- Once all the needed components are added, append the End Event notation. It represents the end of the process/flow. Select the last component and click on the End Event notation.
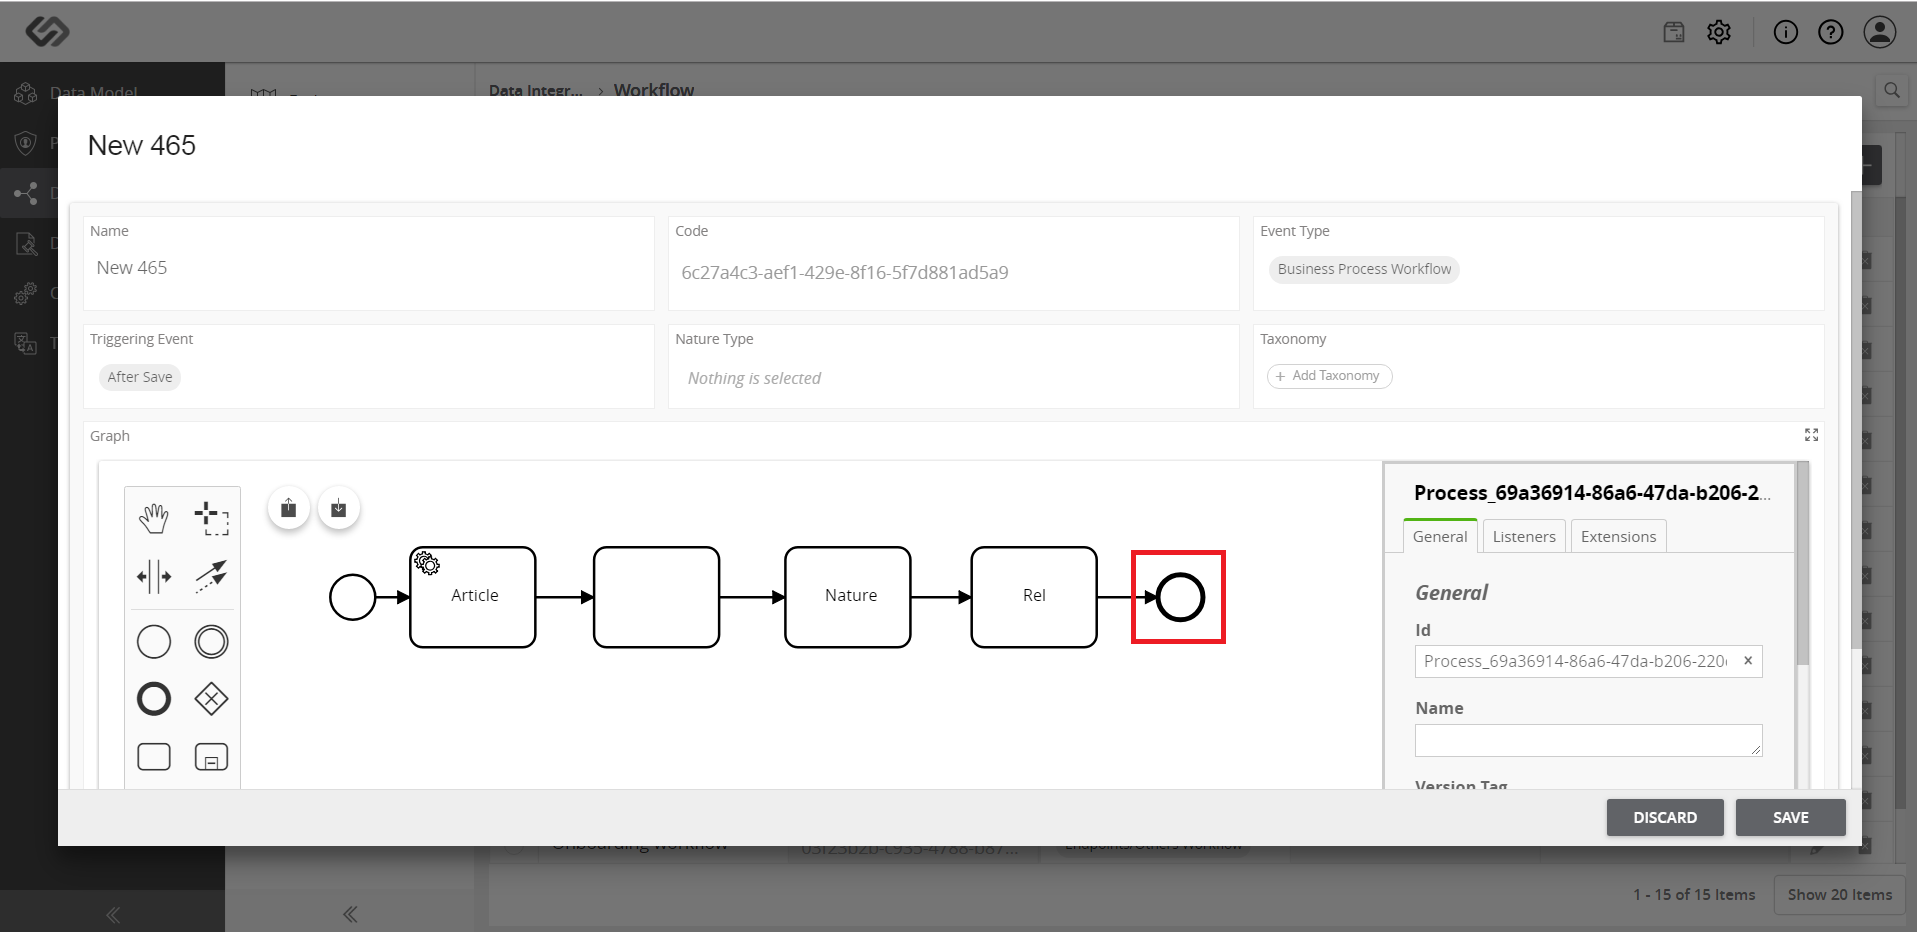
- Check that the End Event notation is appended.
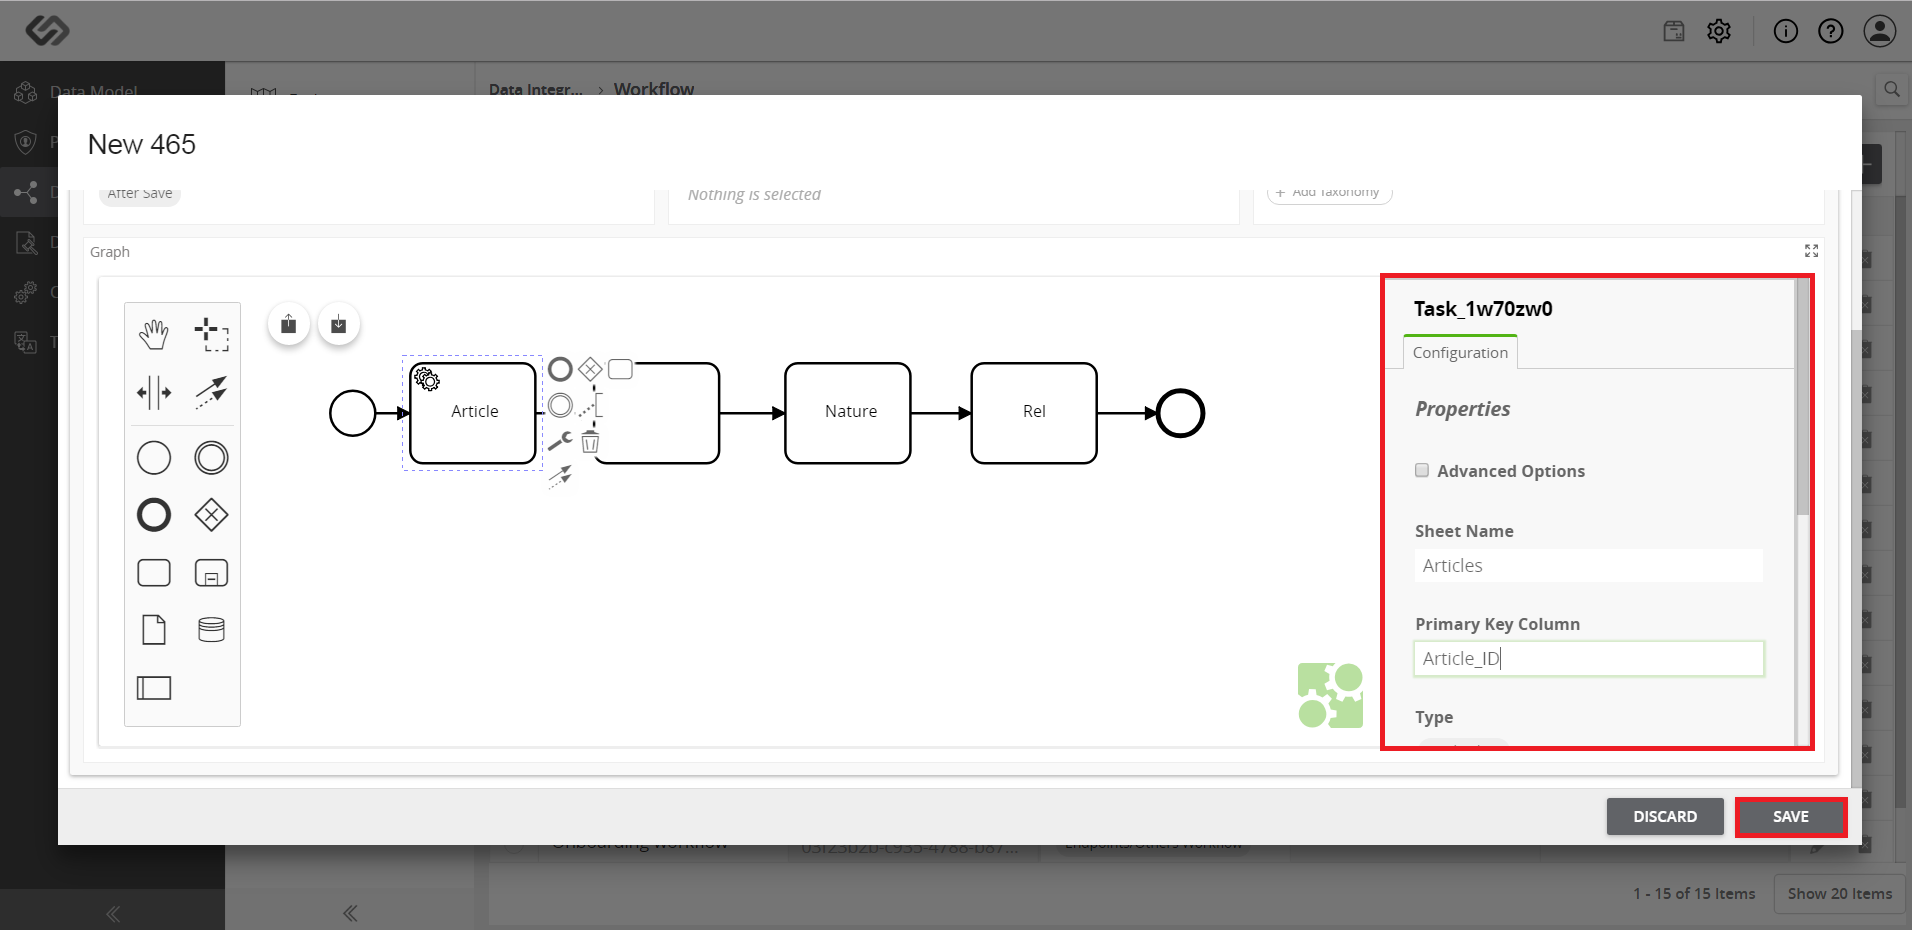
- Click on each component and fill out the details of each component (third vertical section): Sheet Name, Primary Key Column, Type, Class ID/Class Column, Multiclassification, Type, Select Classes/Class Column Name, and Taxonomies. Click on the Save button.
Configure Workflow: Screen Elements
The following details are seen when creating a new workflow in the system.
Create Workflow:
| Sr No | Screen Element | Description |
|---|---|---|
| 1 | Name | Specify the name of a workflow. |
| 2 | Event Type | Select the type of event from the following options:
|
| 3 | Code | Specify the code. |
| 4 | Create | Click Create button to create a workflow. |
Graphical Notations for Defining Workflow:
| Sr No | Screen Element | Description |
|---|---|---|
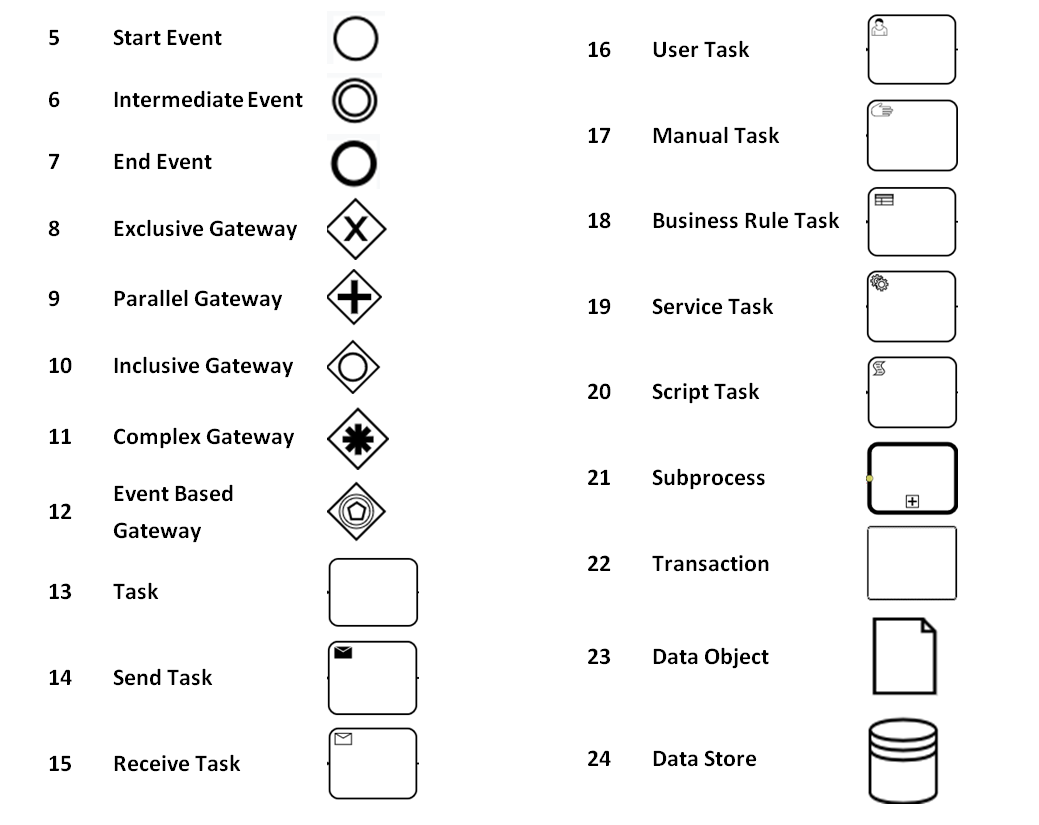
| 5 | Start Event | It acts as a process trigger. The first element in the flow will be the Start Event. |
| 6 | Intermediate Event | It represents something that happens between Start Event and End Event. |
| 7 | End Event | It represents the end of flow. It will be the last element while defining a workflow of onboarding process. |
| 8 | Exclusive Gateway | It is used to select only one of the paths from the created alternative paths or flows, depending on a condition. |
| 9 | Parallel Gateway | It is used to create parallel paths without evaluating any conditions. |
| 10 | Inclusive Gateway | It is used to create alternative flows where all paths are evaluated. |
| 11 | Complex Gateway | It is used only for the most complex flows in the business process. Use the Complex Gateway if you need multiple gateways to describe the business flow. |
| 12 | Event Based Gateway | The condition determining the path of a process is based on an evaluated event. |
| 13 | Task | A task is a type of activity which cannot be broken down further to a basic level of business process details. |
| 14 | Send Task | It is a type of task, which is used to send a message. |
| 15 | Receive Task | It is a type of task, which is used to send a message. It is a simple task that waits for the arrival of a certain message. |
| 16 | User Task | A User Task is used to model work that needs to be done by a human actor. |
| 17 | Manual Task | It is used to model work that is done by somebody who the engine does not need to know of. |
| 18 | Business Rule Task | It is used to synchronously execute one or more rules. |
| 19 | Service Task | It is used to invoke services. |
| 20 | Script Task | It is an automated activity. |
| 21 | Subprocess | It is a compound activity. It can be expanded or collapsed to show or hide the flow objects. |
| 22 | Transaction | Transaction is a form of subprocess in which all activities must be treated as an individual activity. All the activities of a transaction must be completed to meet the objective. If any one of them fails, then all activities must be reverted. |
| 23 | Data Object | It is used store the information used by your business processes. |
| 24 | Data Store | It provides a mechanism to retrieve or update stored information of process. |
Details of Component:
| Sr No | Screen Element | Description |
|---|---|---|
| 25 | Sheet Name | The onboarding file is an Excel file. Excel file may contain different sheets in it. Here, we need to mention the sheet name which contains the component details. |
| 26 | Primary Key Column | All the defined products in an onboarding file have unique identification or IDs. Here, in Primary Key Column, we need to define the column name of the sheet which contains the unique IDs of the product so the system will fetch all of the IDs of the product from the defined column of the sheet. |
| 27 | Type | Here, we need to select one of the options from below:
|
| 28 | Class ID/Class Column | The value of this field is based on the selection in the Type field:
|
| 29 | Multiclassification | Select this option, if defined products in a sheet use Non-Nature Classes. |
| 30 | Type | As soon as you select the MultiClassification option, this option will be visible. Here, we need to select one of the options from below:
|
| 31 | Select Classes/Class Column name | The value of this field is based on the selection in the Type field.
|
| 32 | Taxonomies | Here, we need to enter the column name of the sheet of an onboarding file which contains the taxonomy details. |
| 33 | Save | Click on the Save button to save the workflow details. |
