Modeler to Design Workflow
The Modeler to Design Workflow feature allows the user to configure a workflow using the modeler.
| Key Term: |
|
| Description: |
|
| Related topics: | |
| Application: |
|
How-to: Configure Workflow Using Workflow Modeler
To configure a workflow, follow these steps:
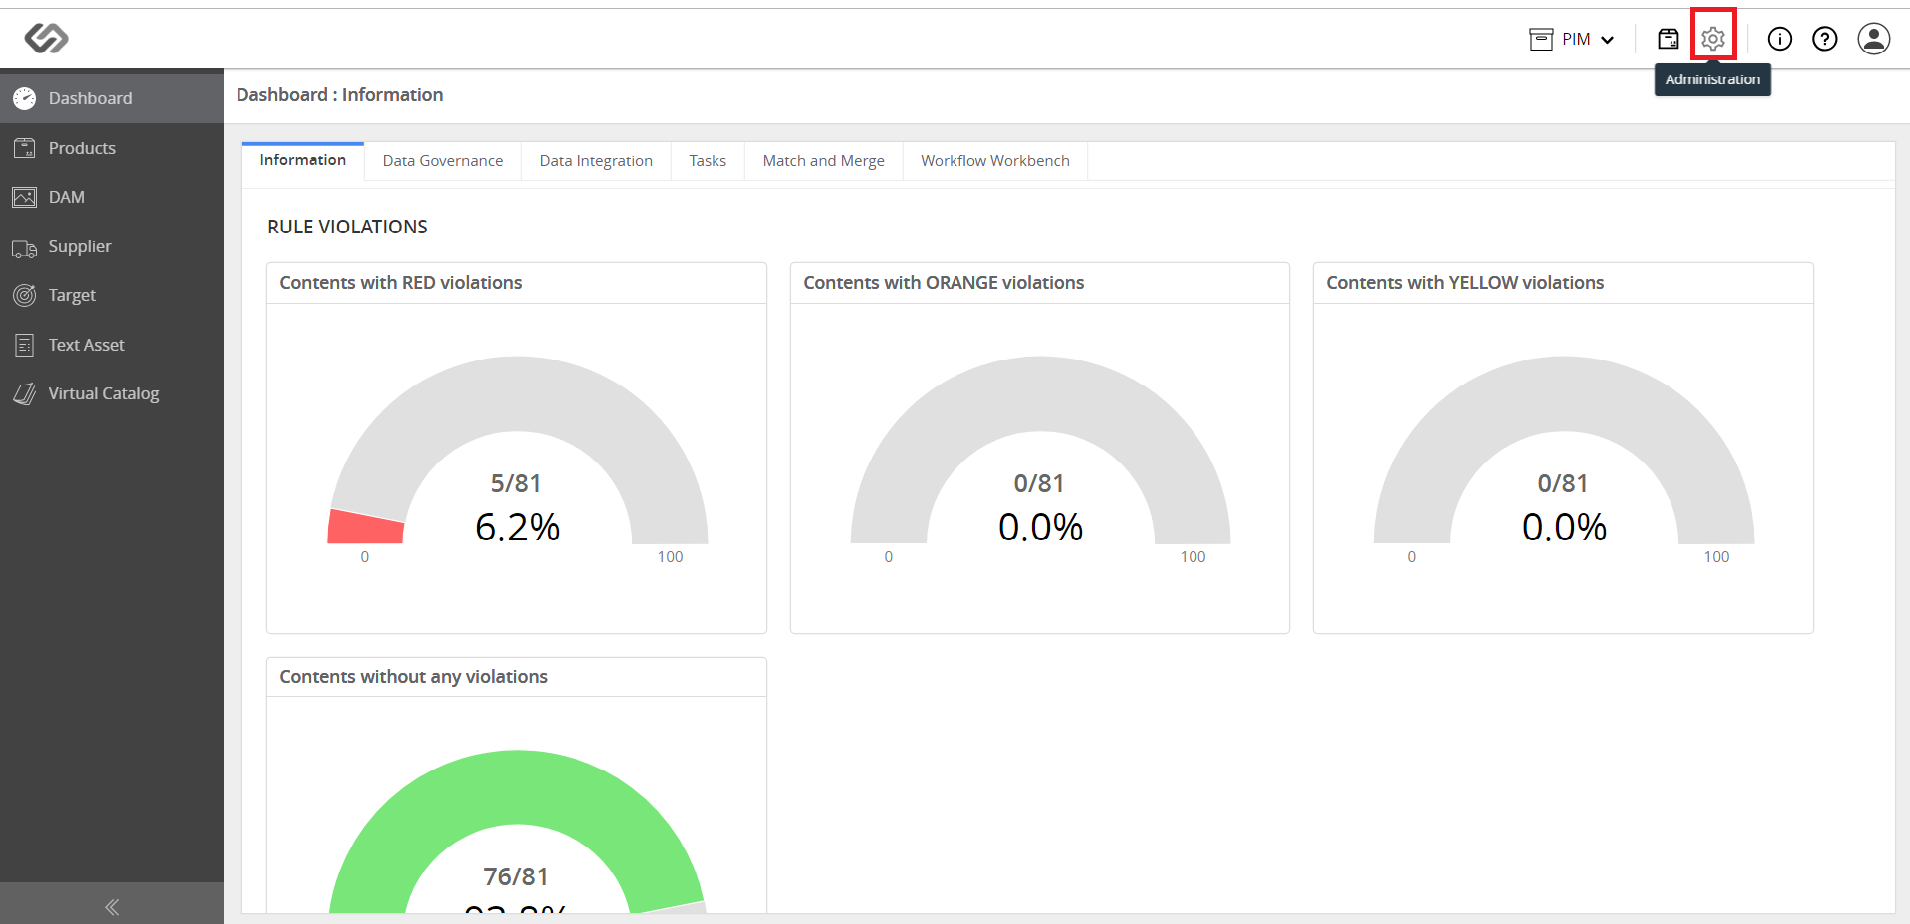
- Log in to the application. Click on the Administration icon.
- Navigate to Data Integration –> Workflow menu.
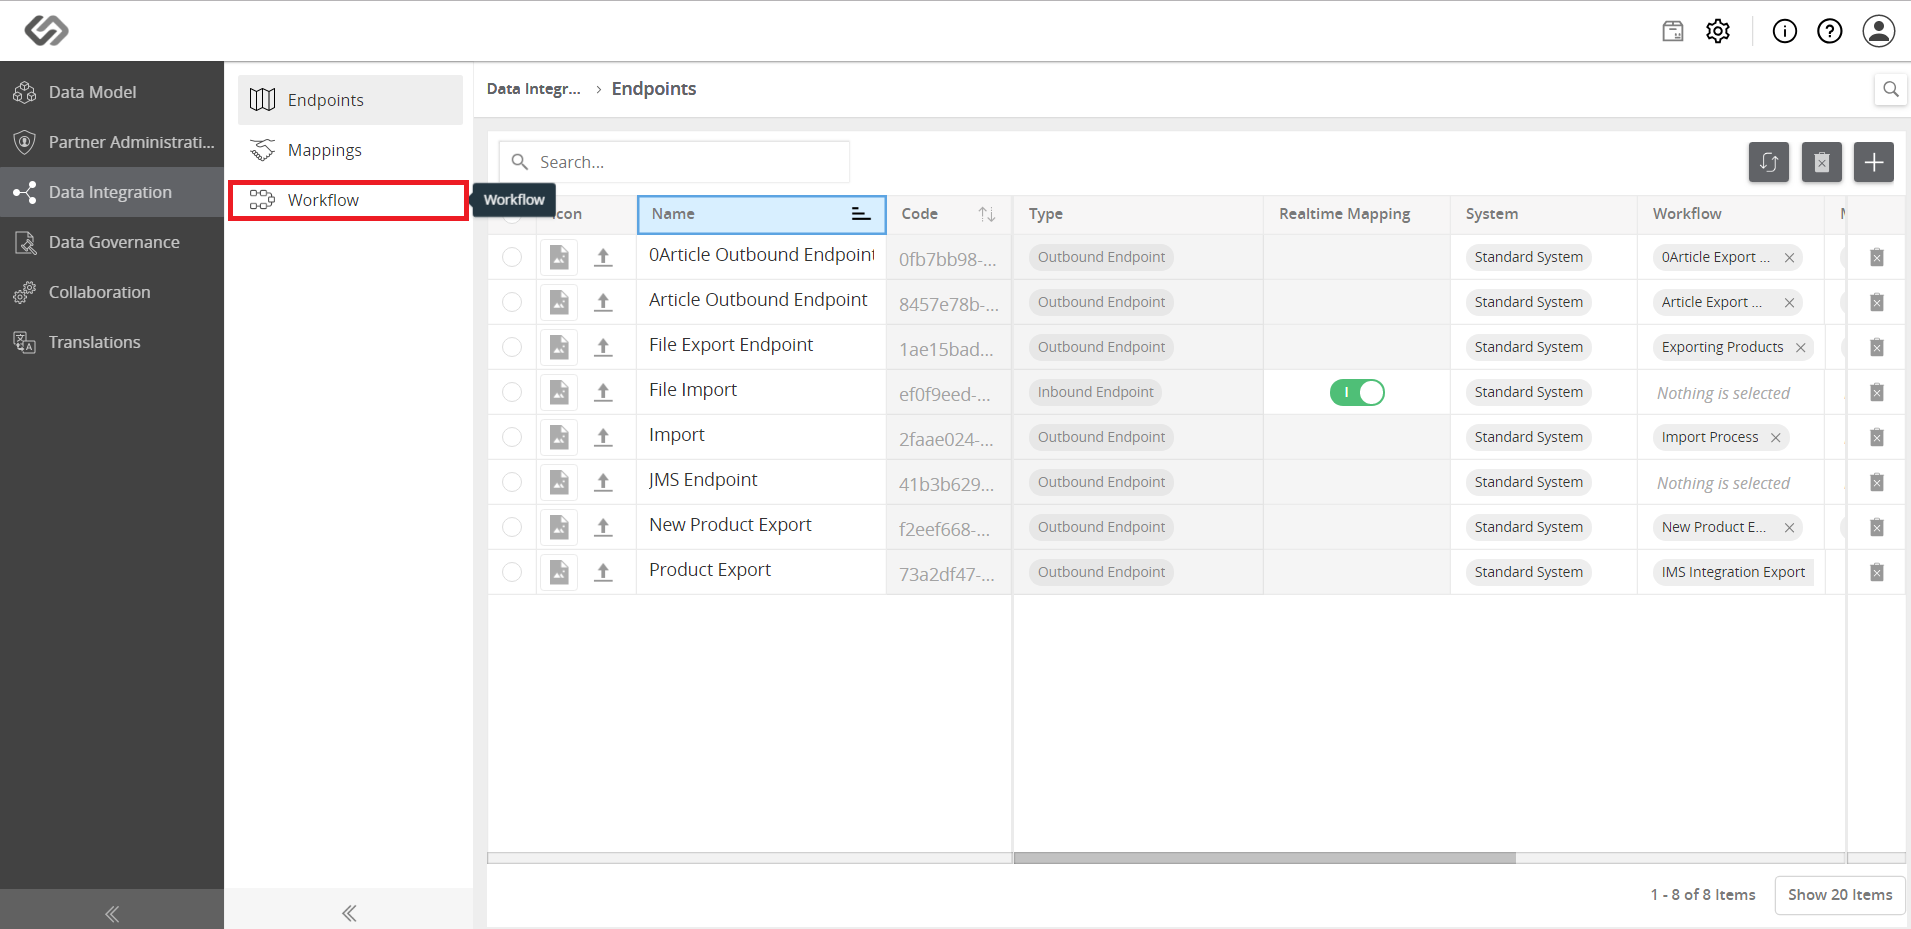
- Click on the “+” icon to create the workflow.

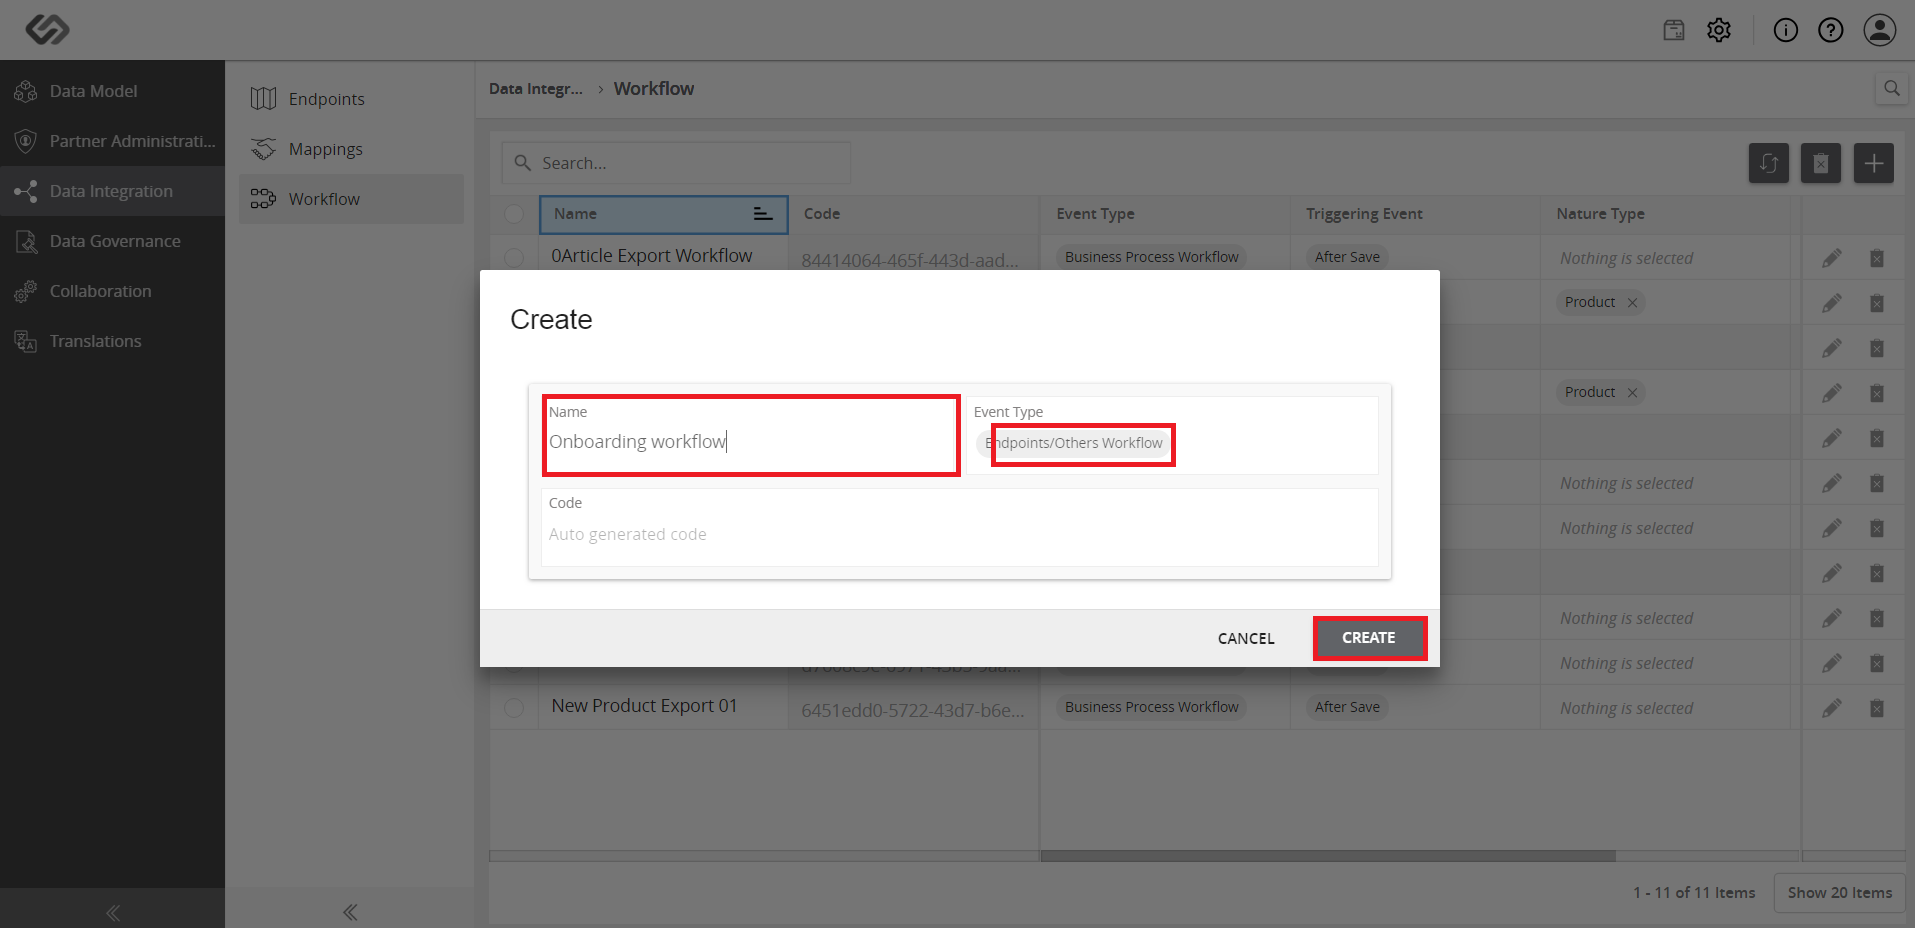
- Enter the details such as Name, Event Type, and Code, then click on the Create button.
- Select the created workflow to open a pop-up window where you can define the workflow of the onboarding process.
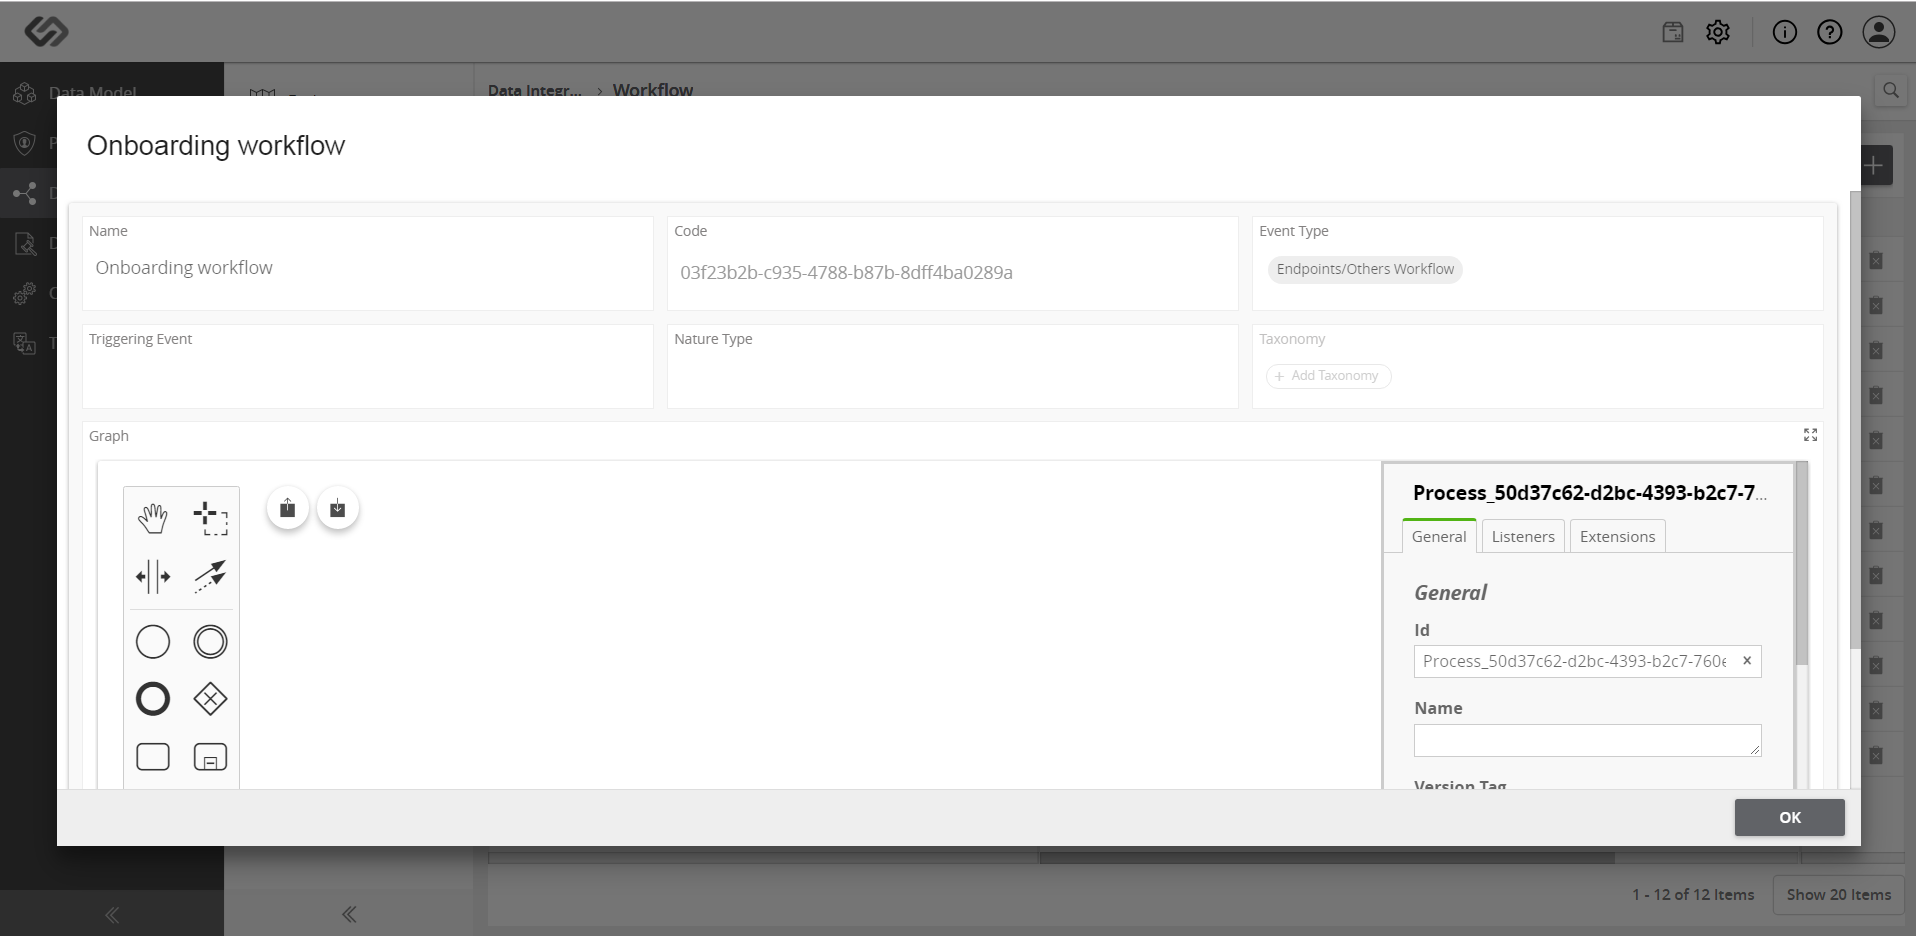
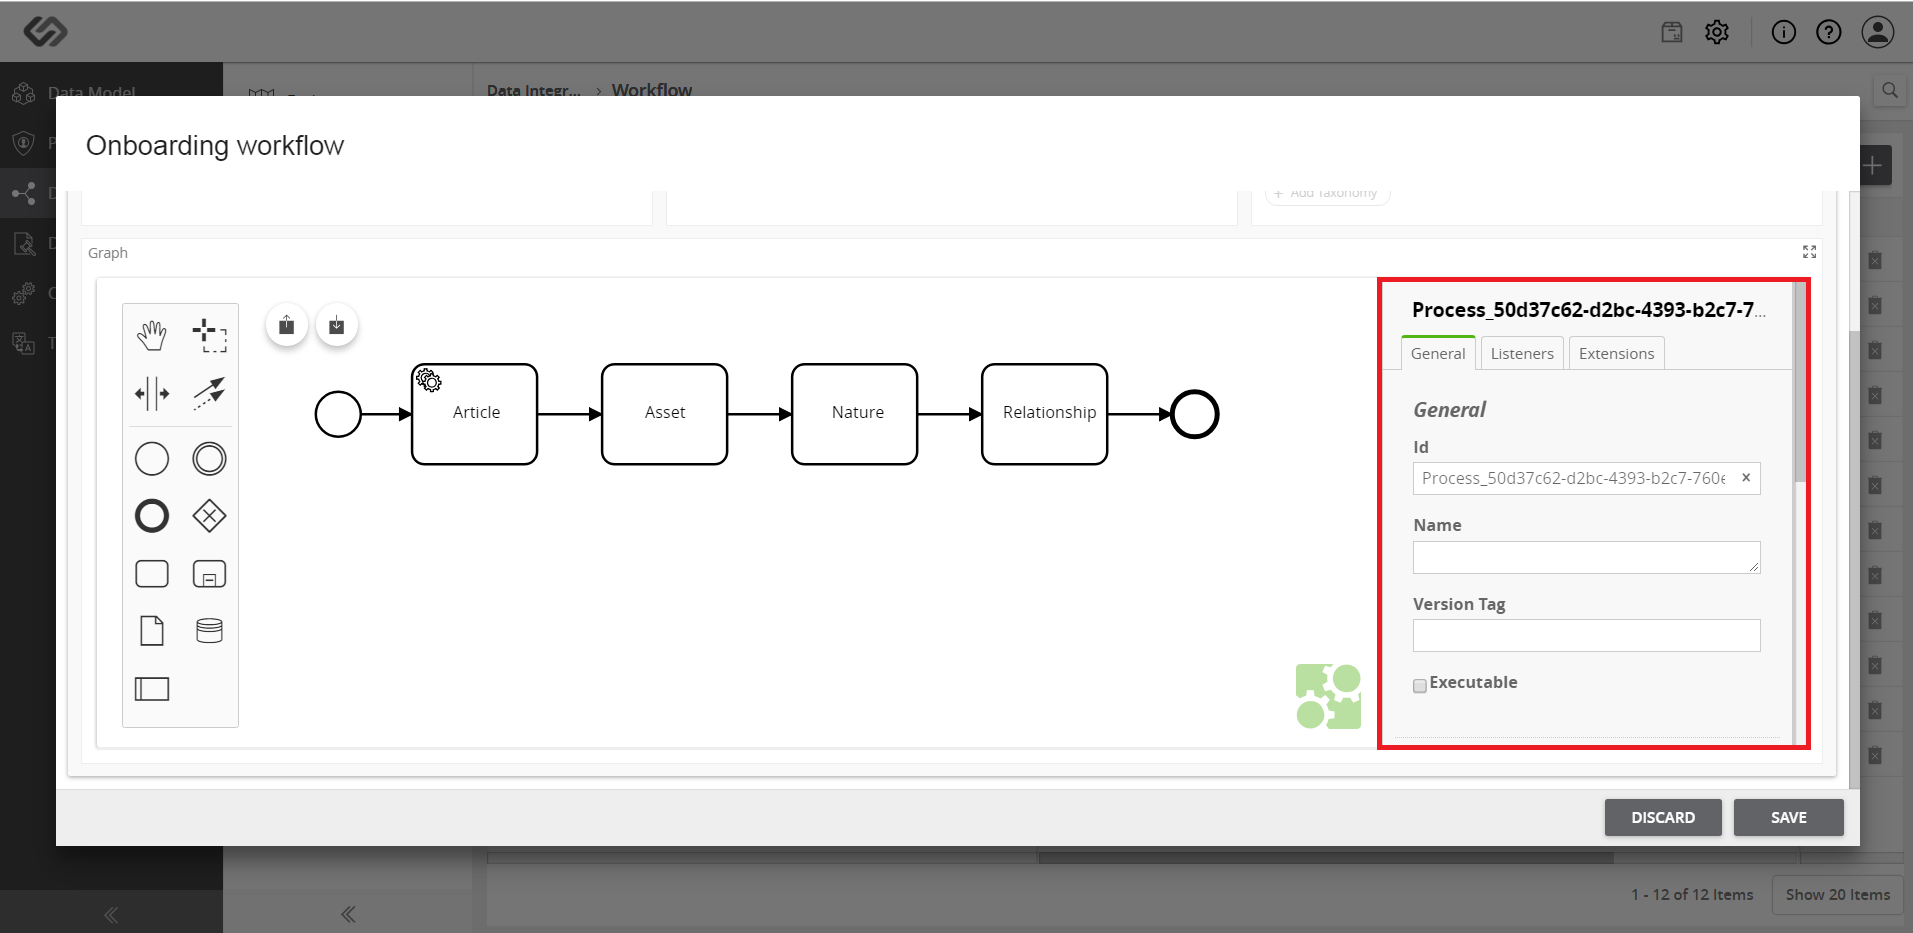
- The Graph section in the pop-up window is divided into three vertical sections. The first two vertical sections are called Workflow Modeler. It allows to configure workflows using BPMN 2.0 modelling notation. This will allow users to model complex onboarding process using universally known and standardized BPMN 2.0 notation.
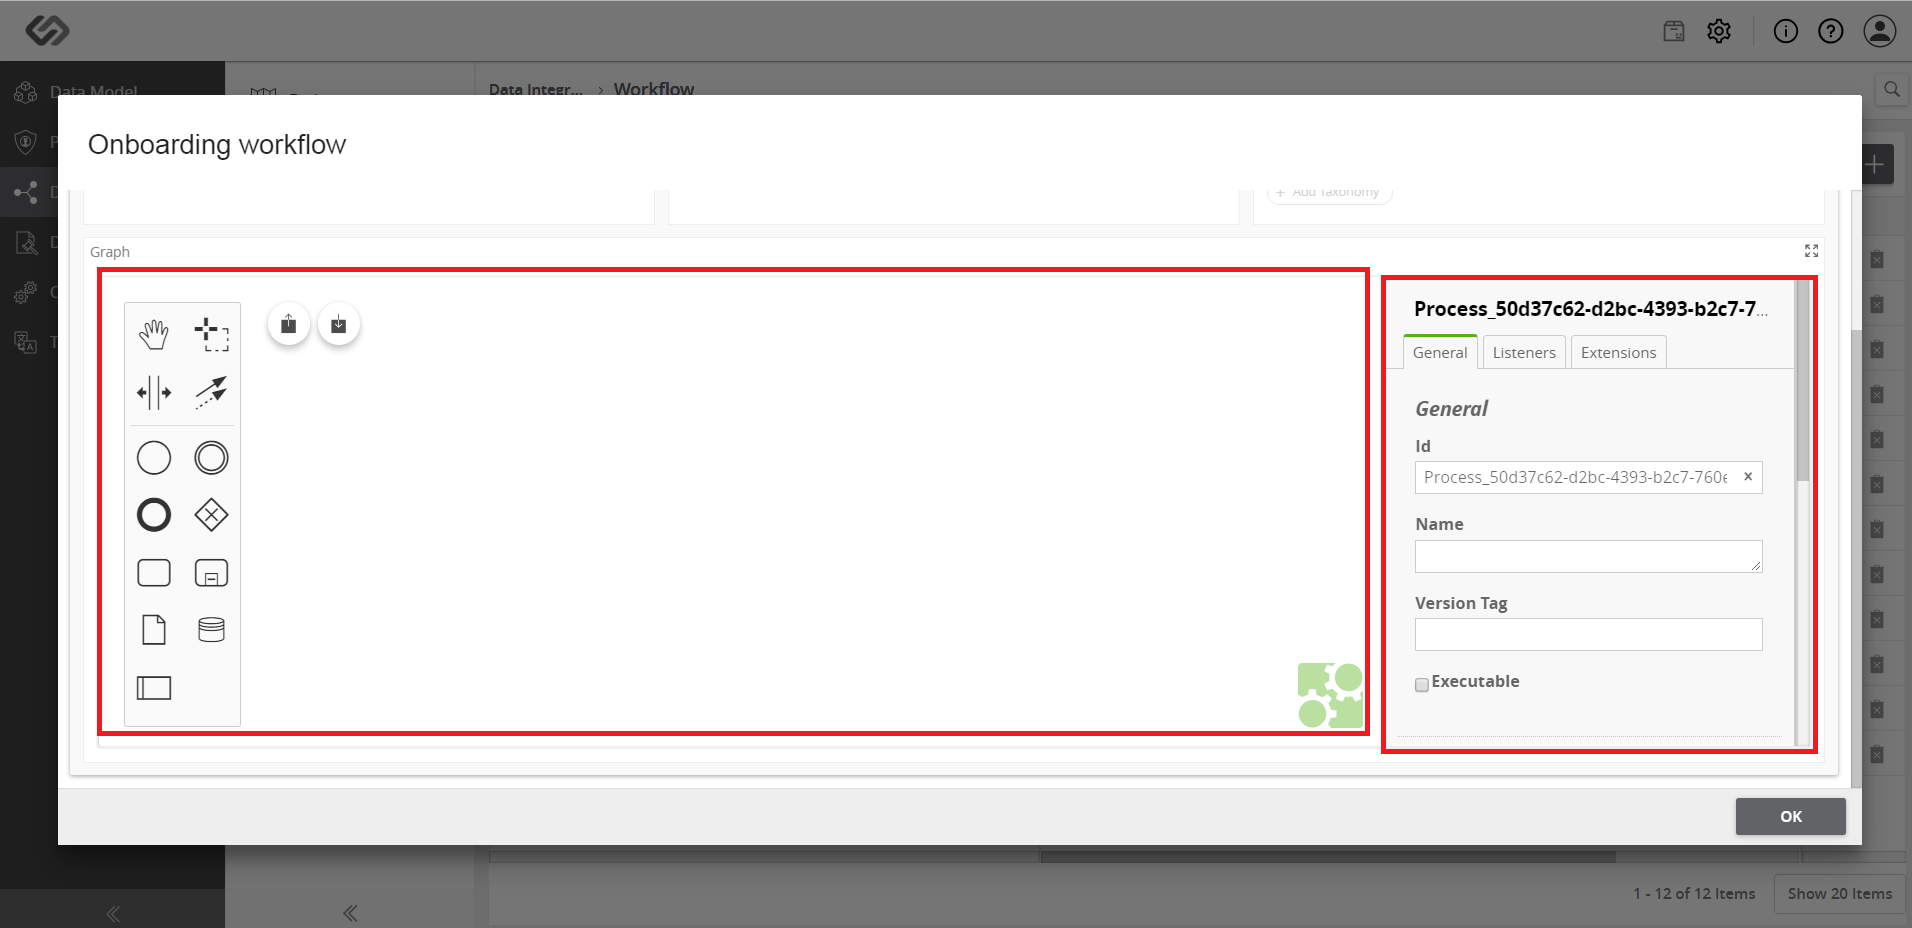
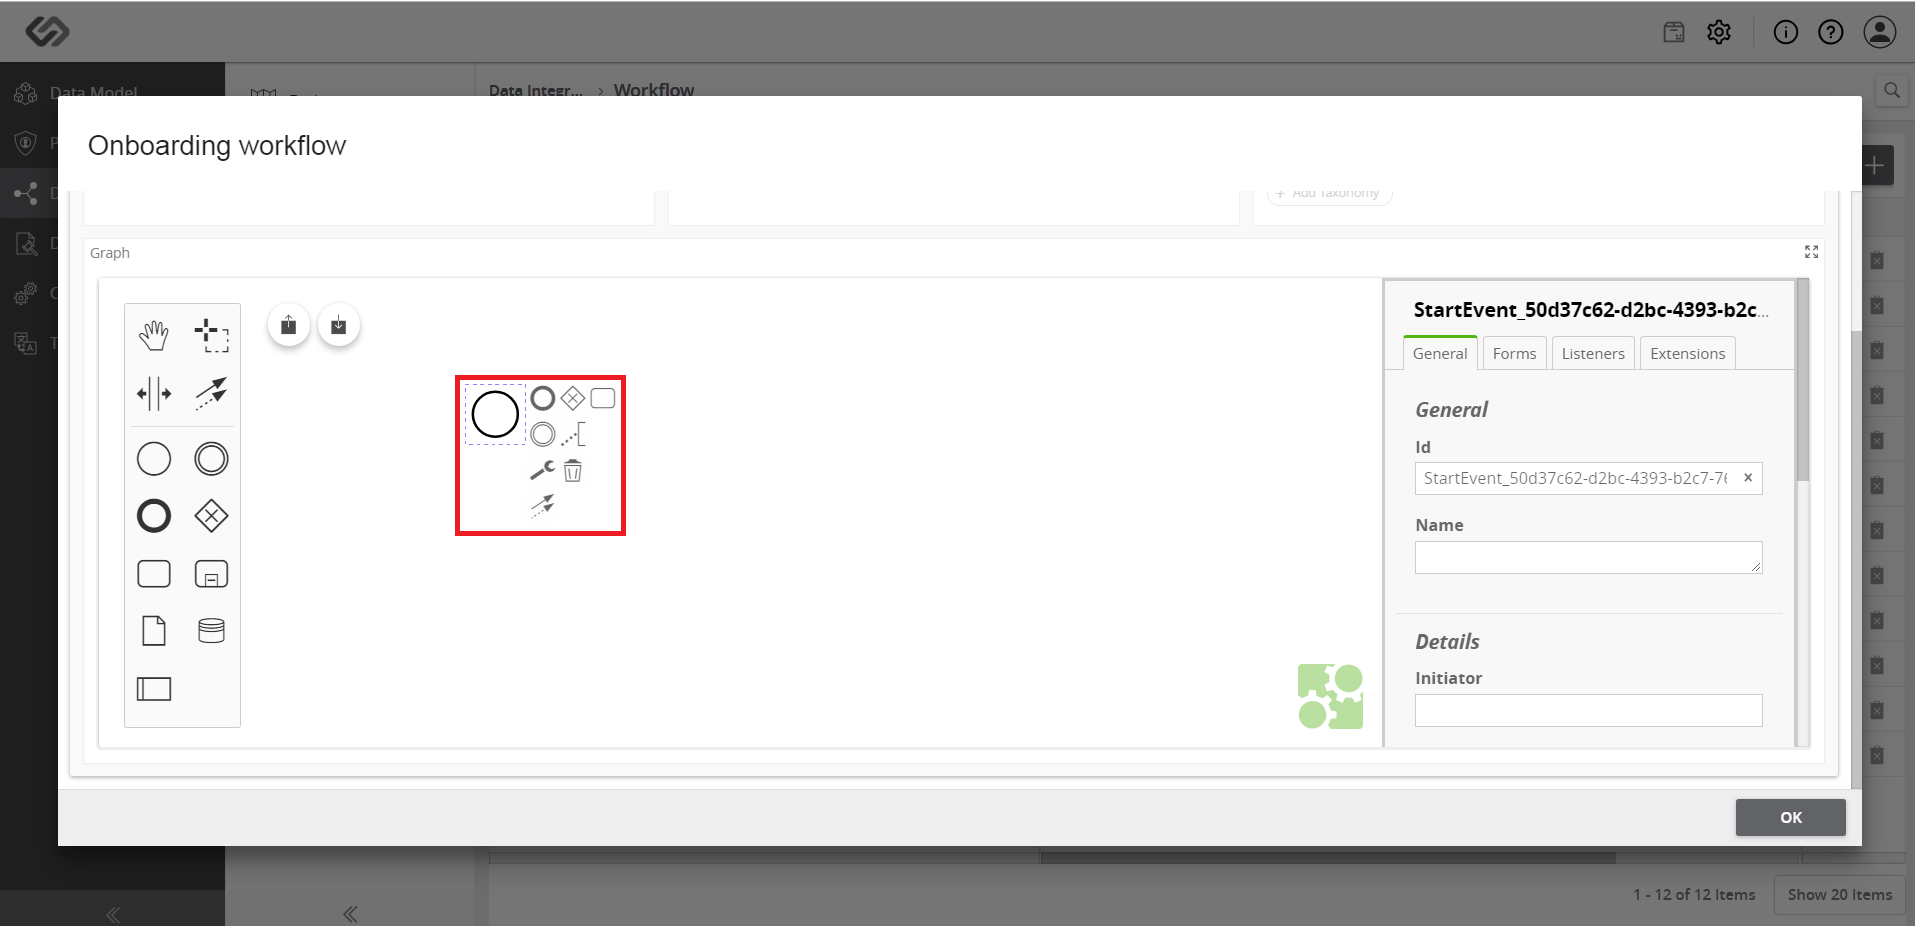
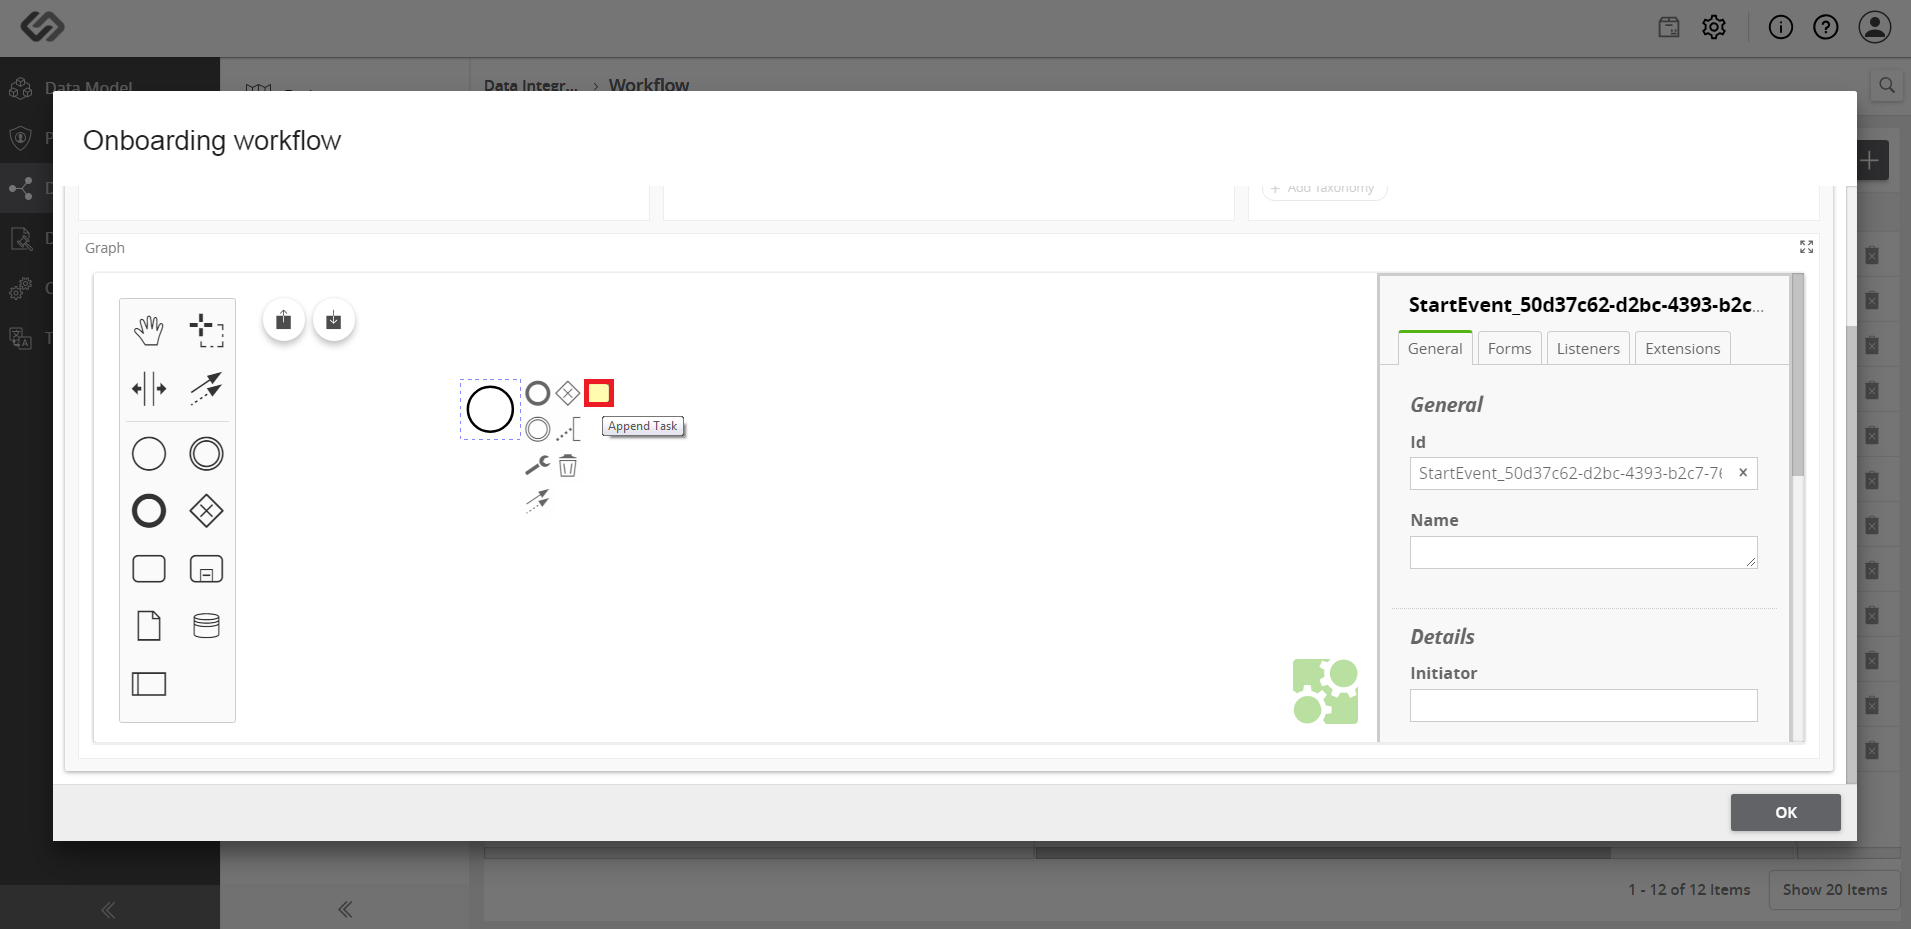
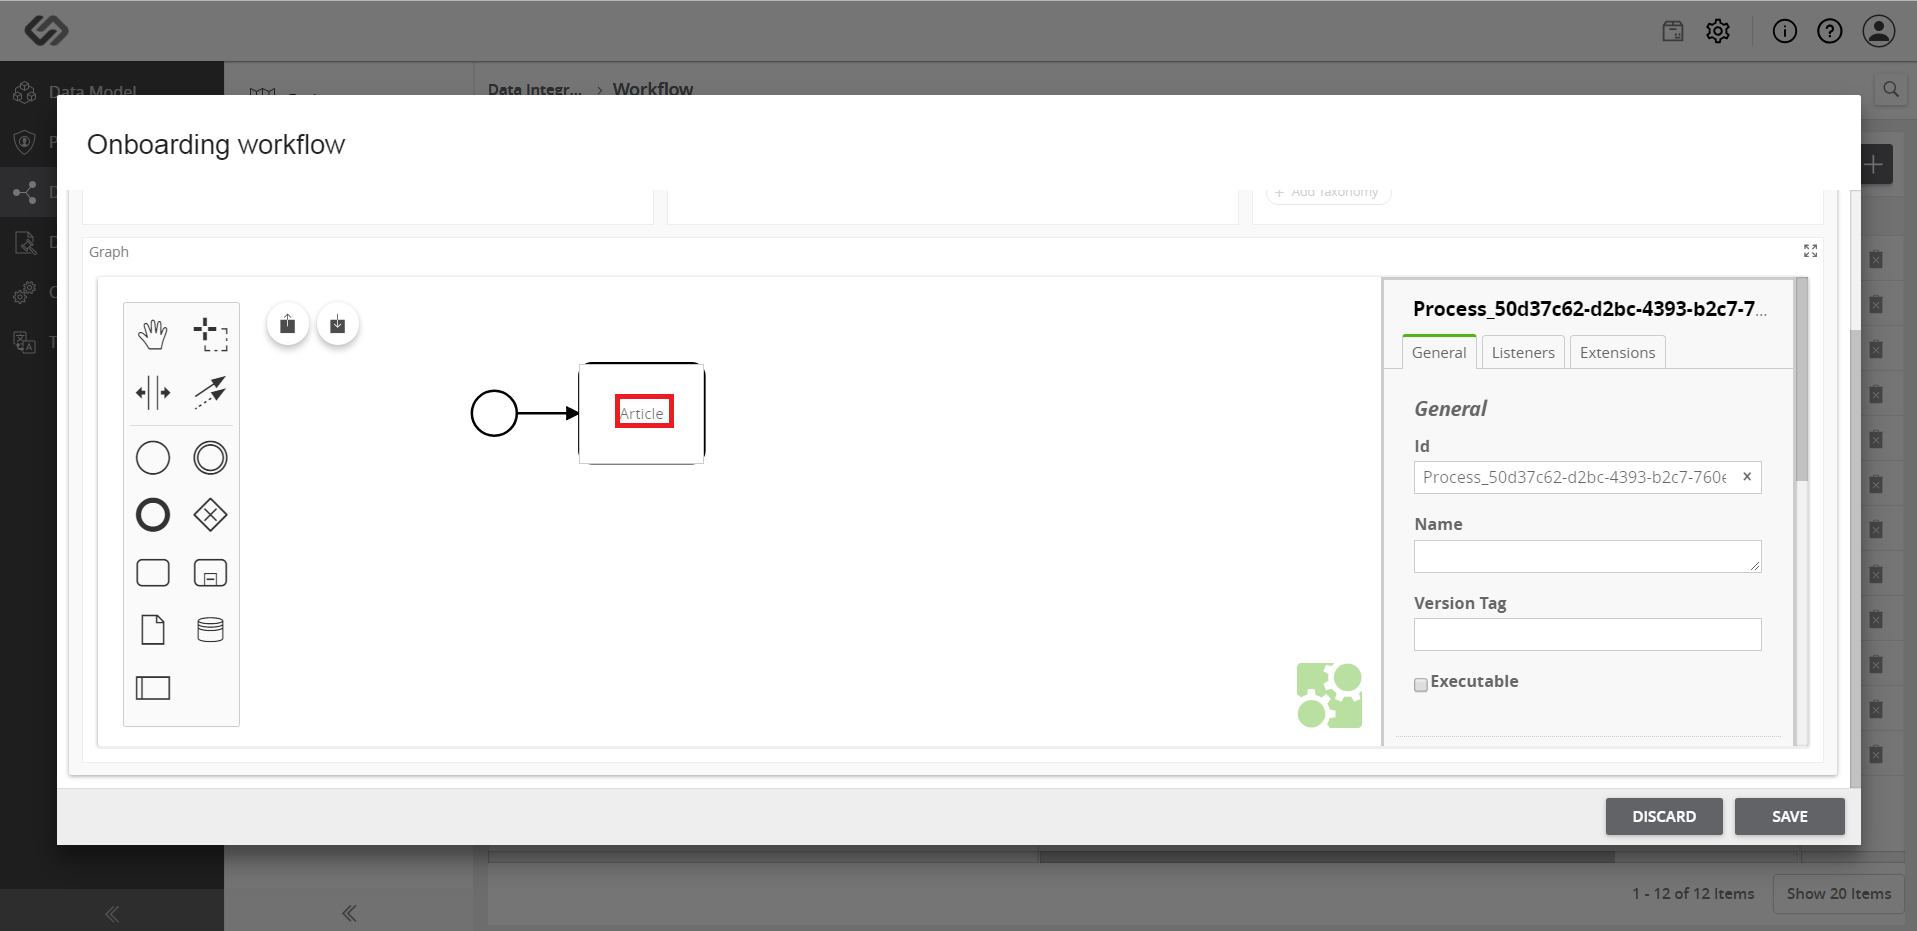
- Drag and drop the notations in Workflow Modeler to define the onboarding process. A workflow starts with the Start Event. The Start Event acts as a process trigger so it is the first element in a workflow.
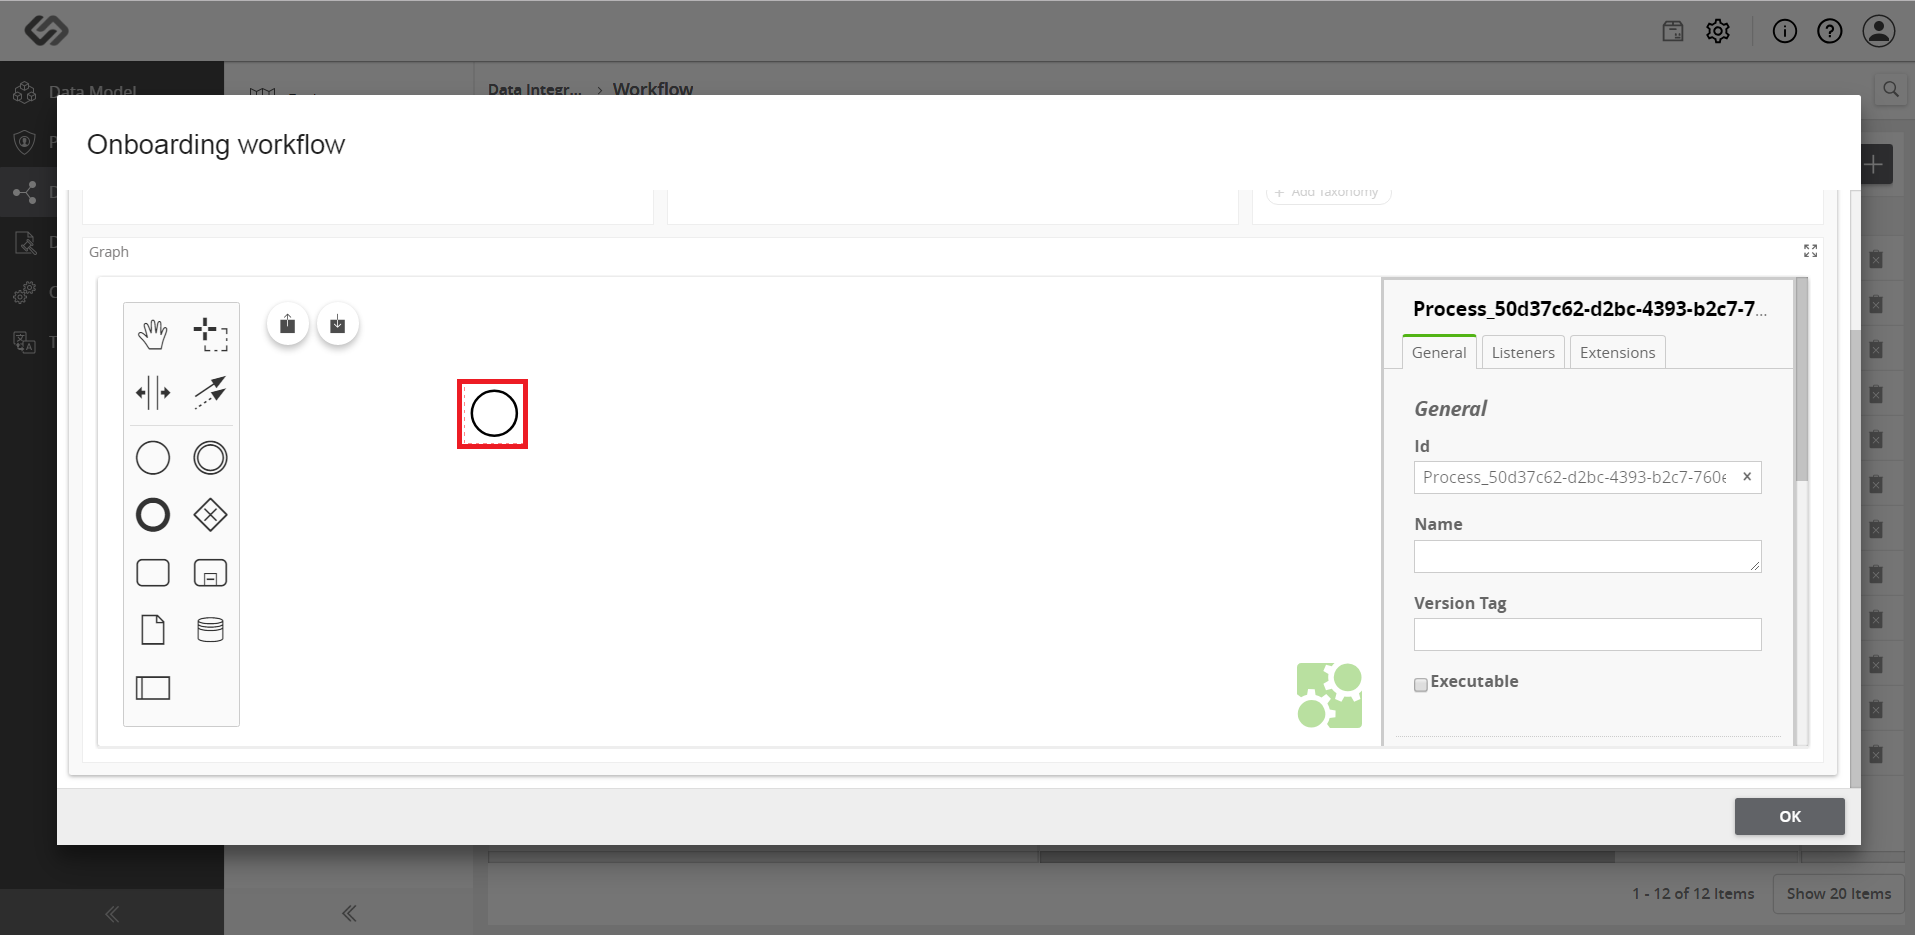
- Select the Start Event notation to show the options for that notation.
- Start adding the notations to define a workflow according to the onboarding file. For example, if you want to add Article in the workflow, then click on the Task notation. Custom actions for different users will be managed through the workflow Task.
- Once you click on the Task notation, it gets added in the workflow.
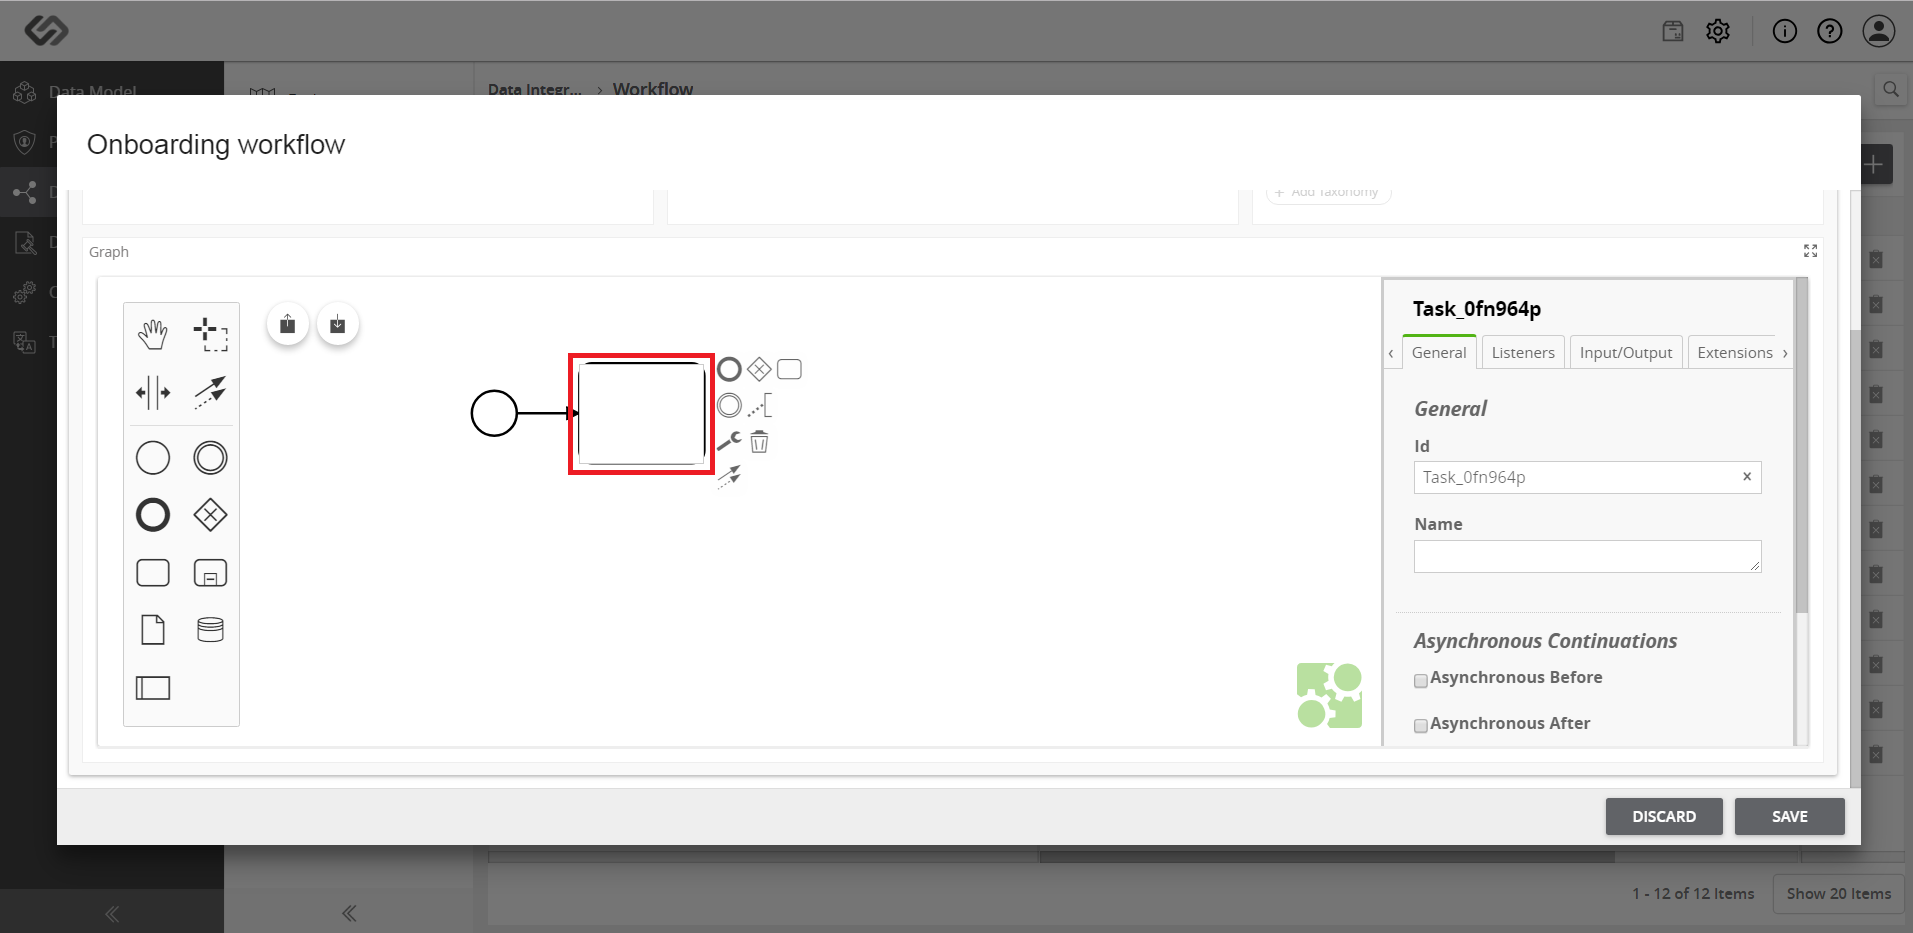
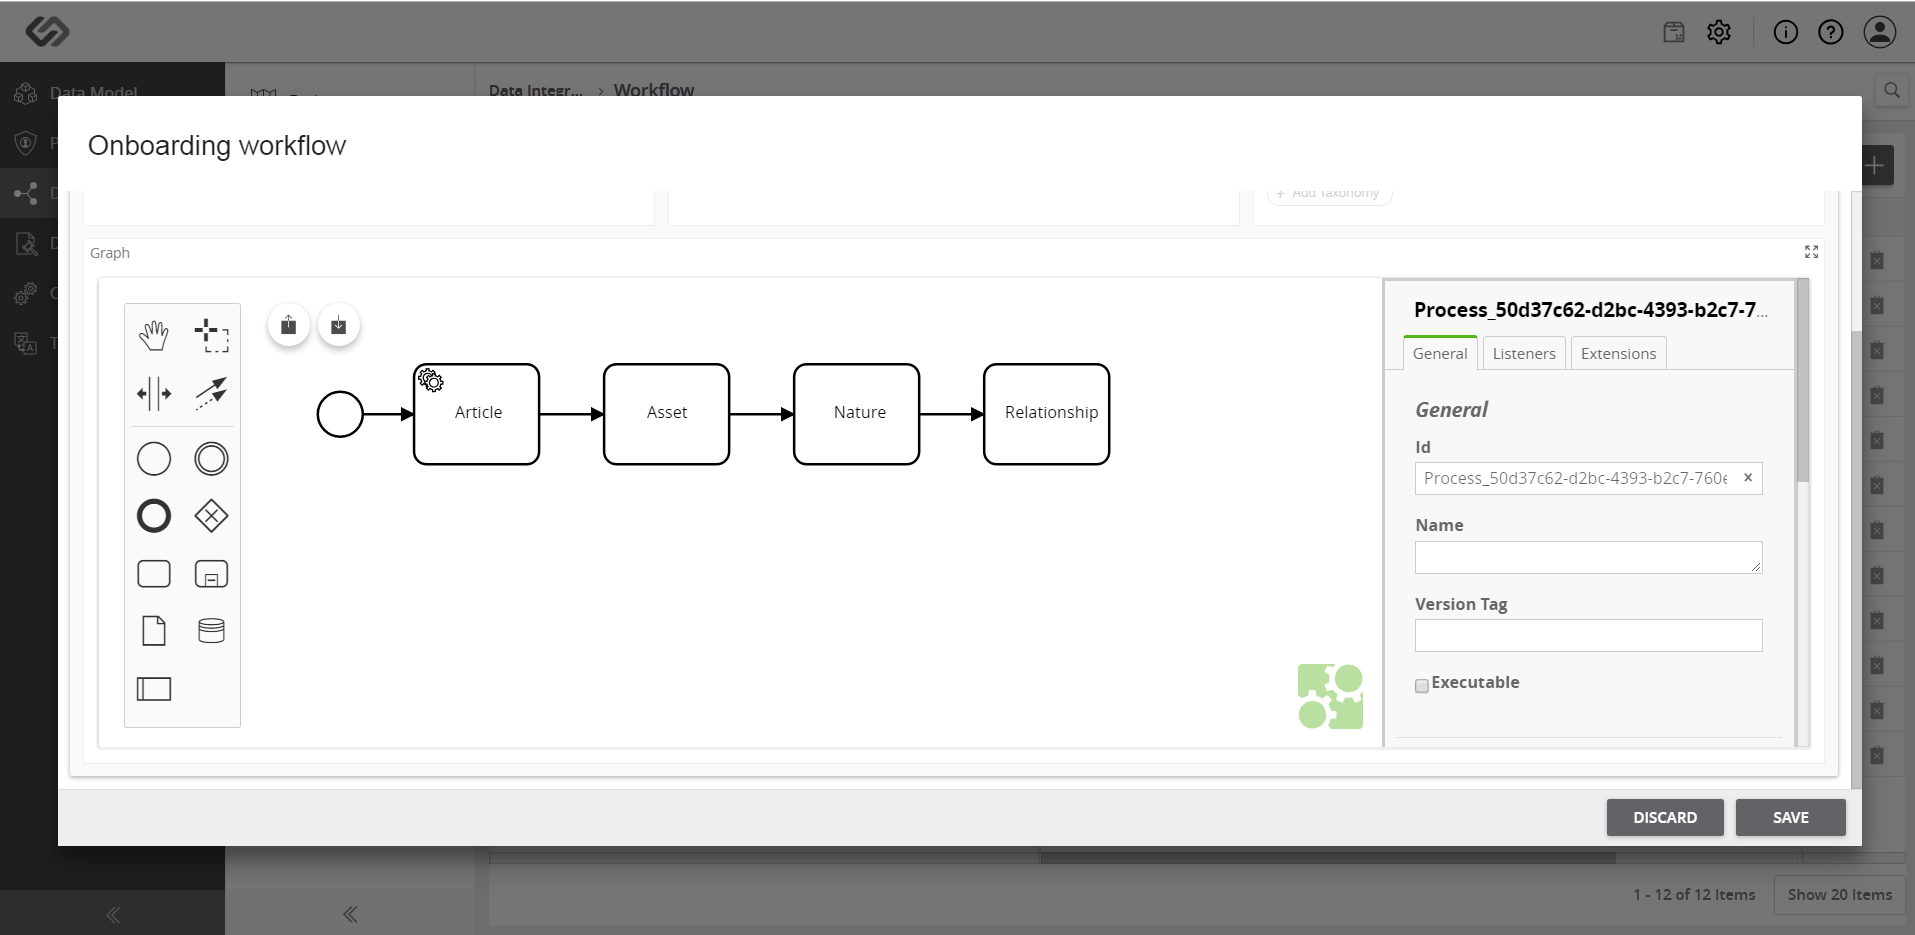
- Adding the Task notation simply defines the task. Click on the Wrench icon to define what kind of a task it is, whether it is import article, import asset, import relationship, etc.
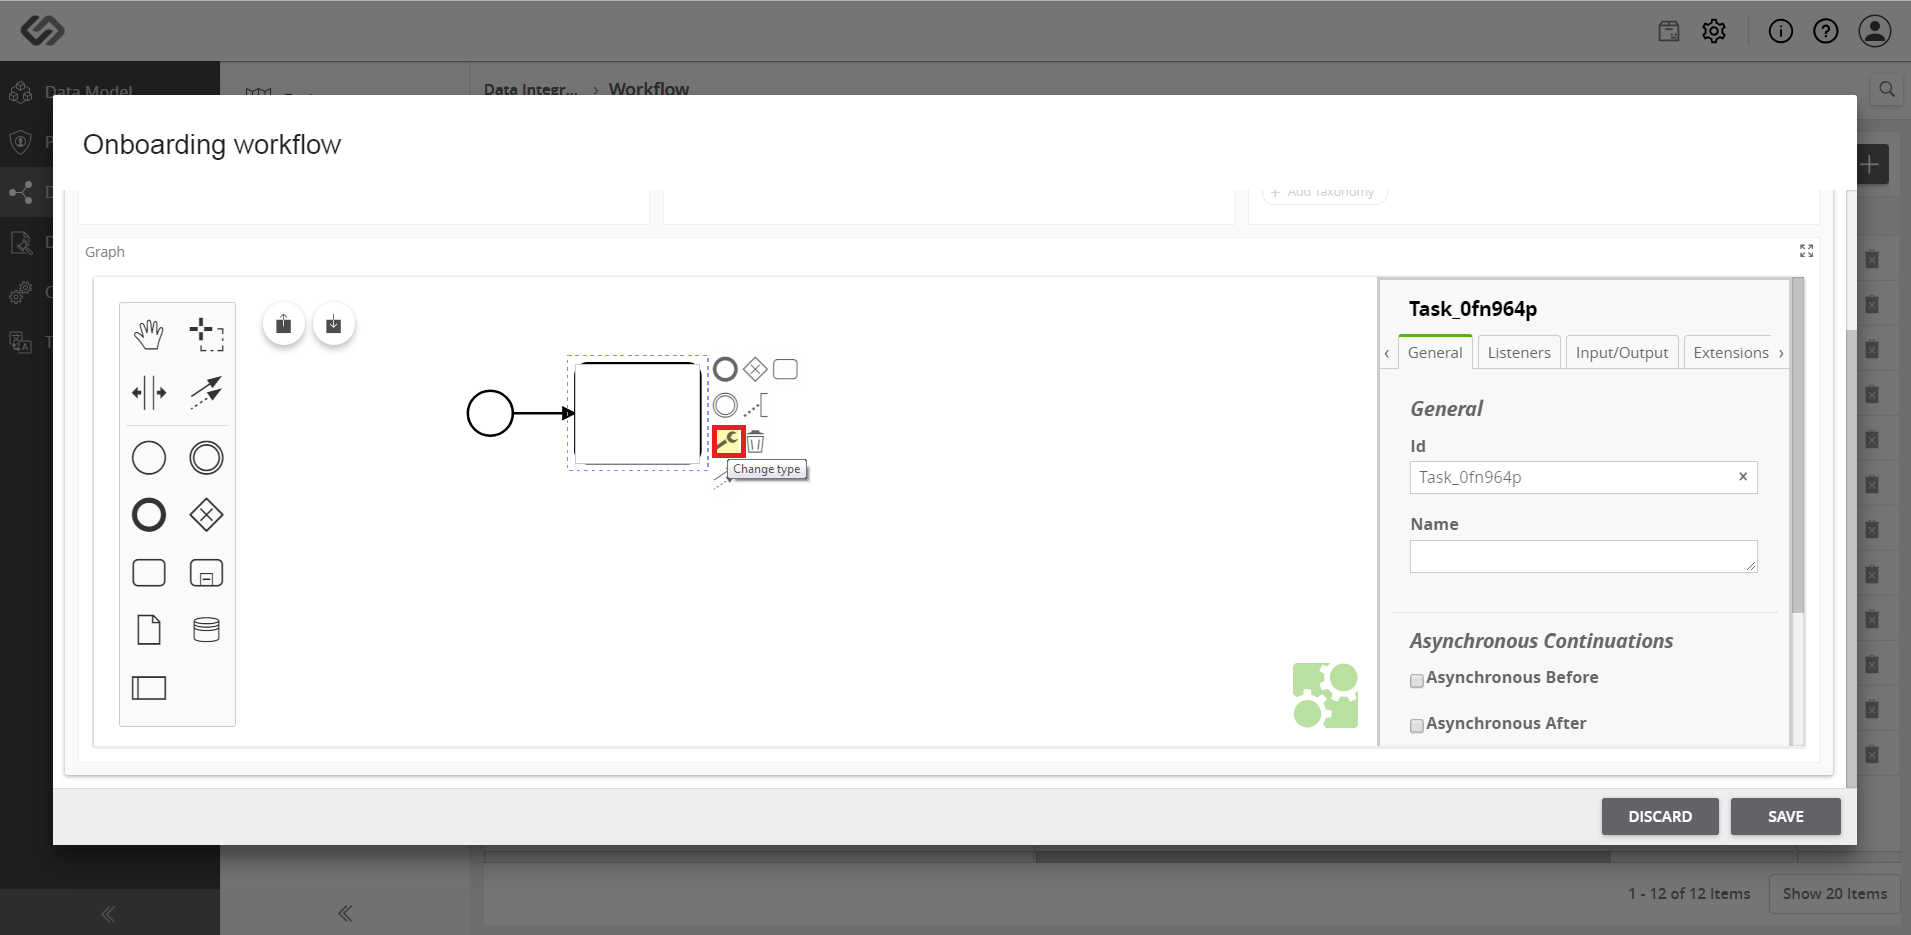
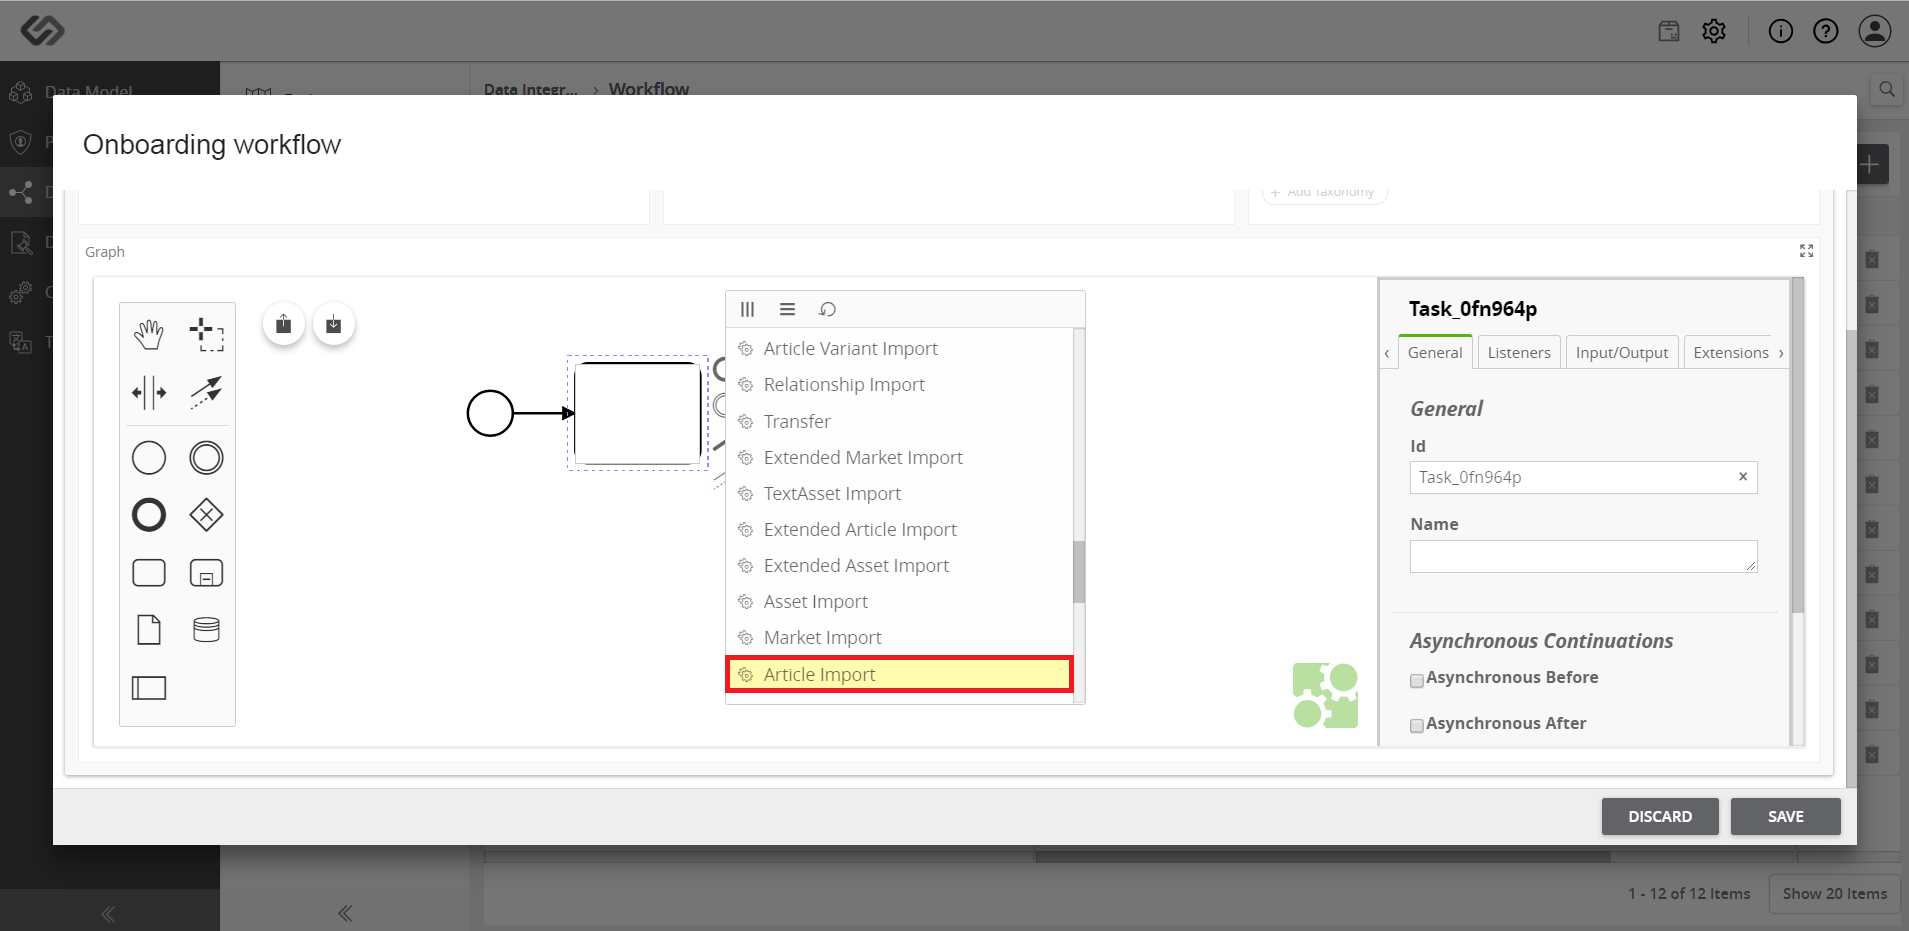
- As soon as you click on the Wrench icon, a window appears containing the types of task.

- If you are defining an article, select the Article Import option from the list.
- Double-click on the created task icon and enter a name for that icon.
- Define the components of the system such as Assets, Relationships, and Nature Classes. Create a task, click on the Wrench icon to select the type, and enter a name for that task.
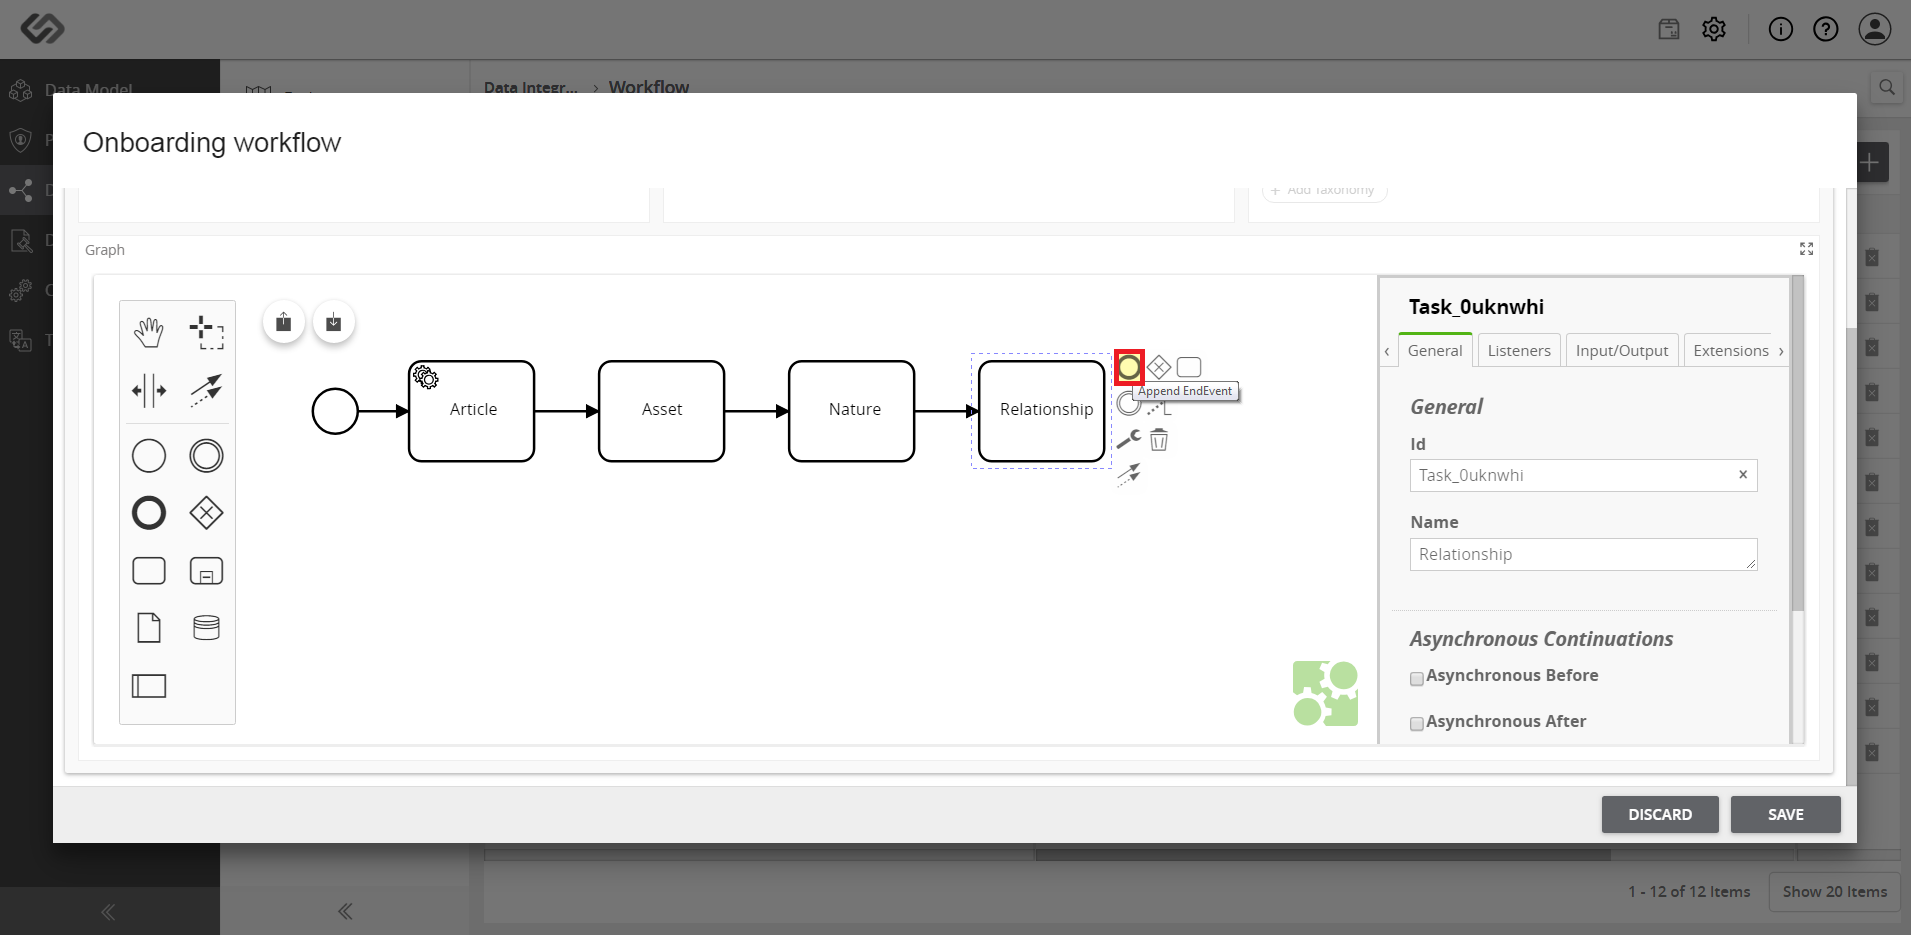
- Once you added all the components in a workflow, append the End Event notation at the end. It represents the end of the workflow. Select the last component and click on the End Event notation.
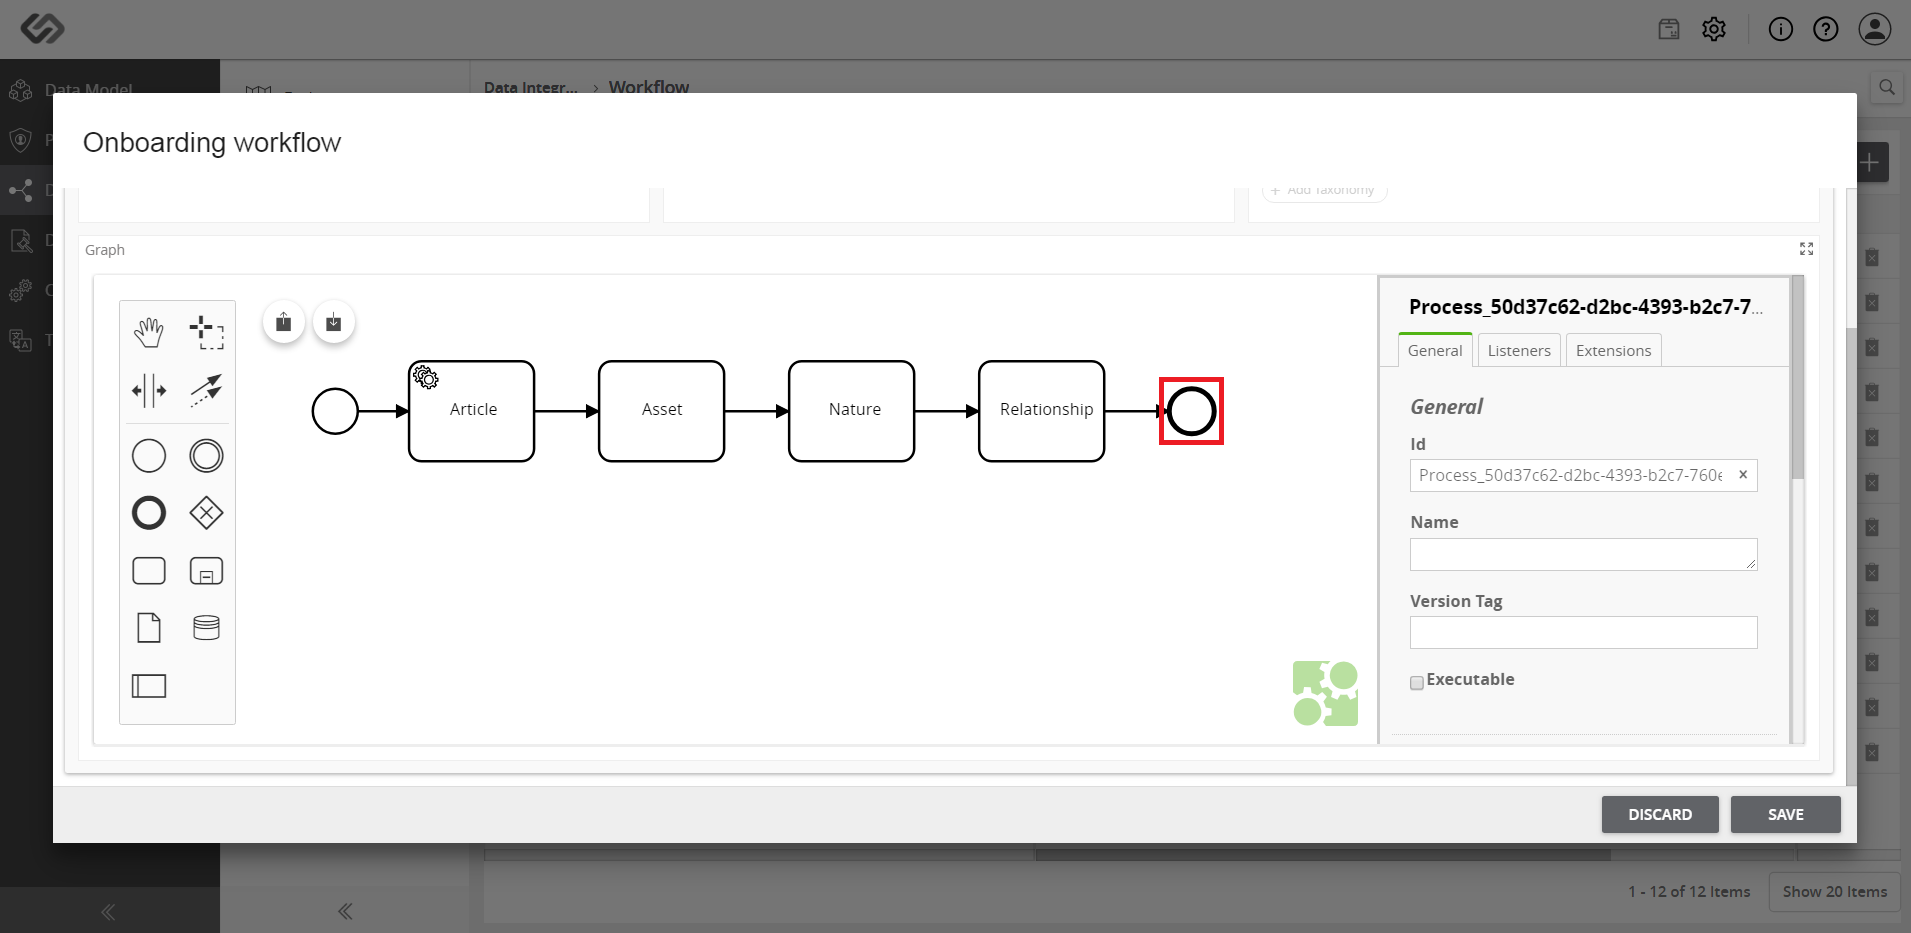
- View the End Event notation appended at the end of the workflow.
- Click on a component and in the third vertical section, fill in the details of the component such as Sheet Name, Primary Key Column, Type, Class ID/Class Column, Multiclassification, Type, Select Classes/Class Column Name and Taxonomies. Perform this step for each component then click on the Save button.